

Industry News
The secrets of Rough Polishing
The secrets of Rough Polishing
What Is Rough Polishing & Why We Need To Do That?
Rough polishing is to remove file marks, burrs on the surface of the ring, and the black oxide layer left by the welding. Try to make it flat, coordinate, and smooth the arc to make the lines smooth.However, you should not polish too hard. If you leave a depression on the ring surface, it will be difficult to restore its appearance.
Rough polishing is the basis of the next process like fine polishing. If it fails to meet the requirements, it will affect the later polishing and directly affect the quality of jewelry.
When you using rough polishing and important tips
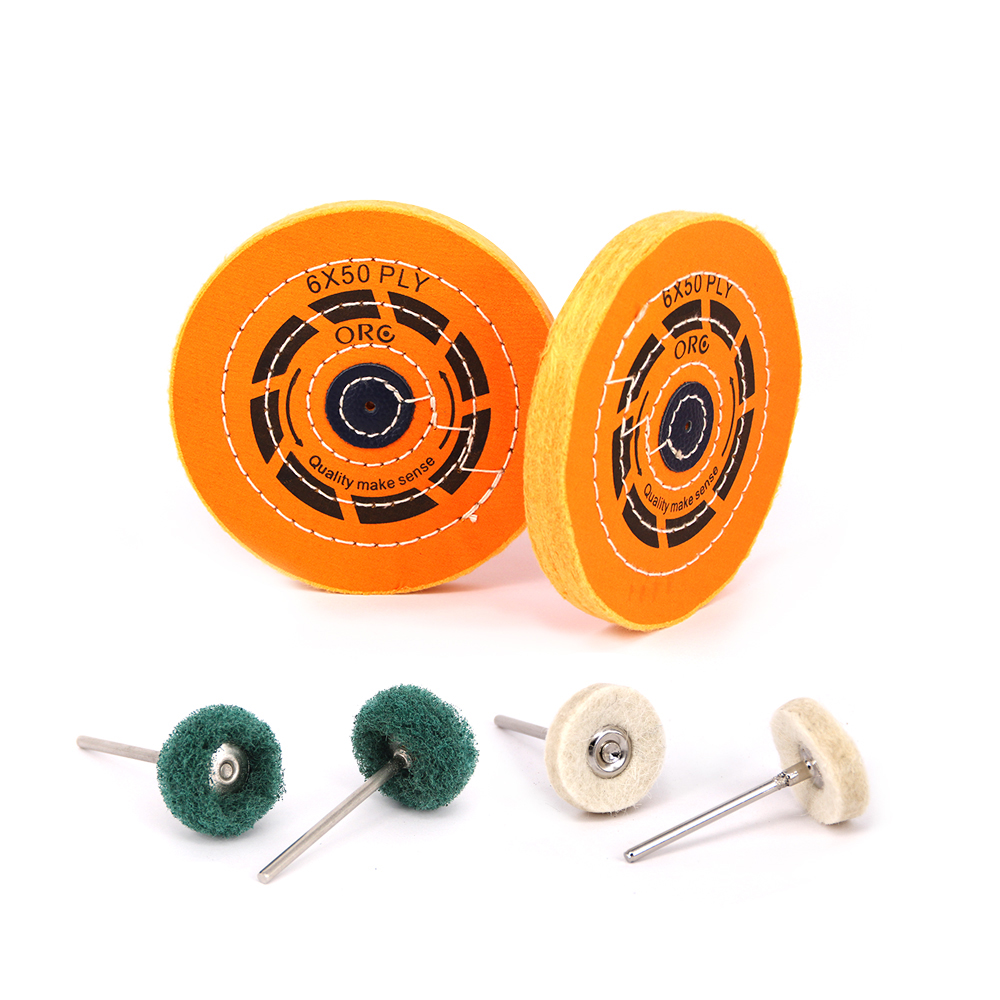
1.Rough polishing of inside ringUsing inner felt polisher
together with rough polishing compound(usually white color)
When you use a inner felt polisher, you should select a suitable size according to your needs, and the compounds is necessary. During the polishing period, make sure the touch area of the polisher & ring, that is, the ring cannot be inserted too deep into the polisher, and keep the polished contact surface to be 1/3 of the inner ring arc.
The polishing contact surface is too small, the work efficiency is low; the contact surface is too large, it is very inconvenient to change the polishing position, and because of the high friction resistance, it is difficult to hold the ring to be polished, and it is easy to cause the polishing ring to fly out and damage the ring surface & ring shape.
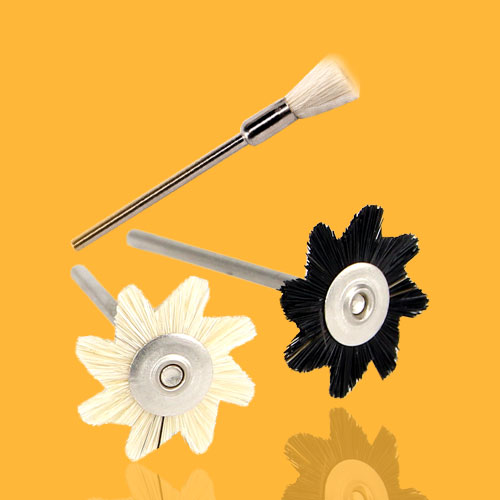
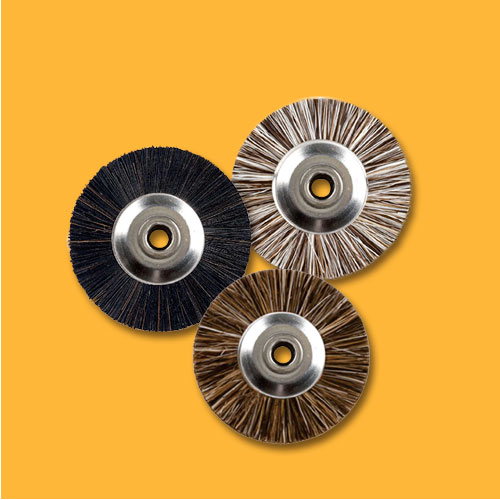
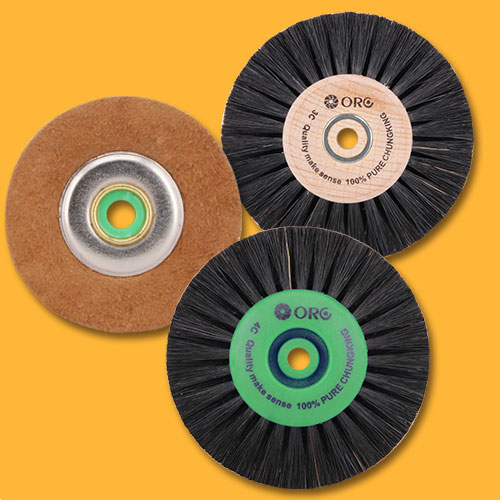
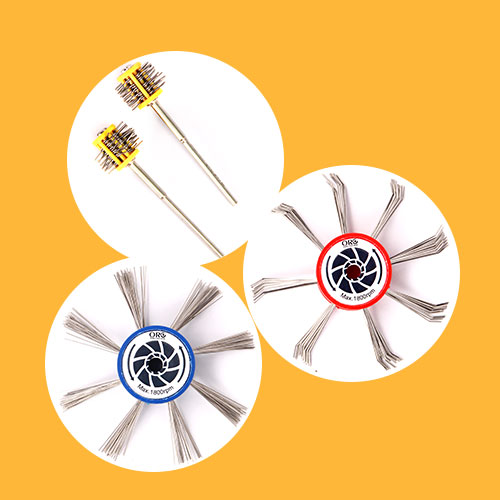
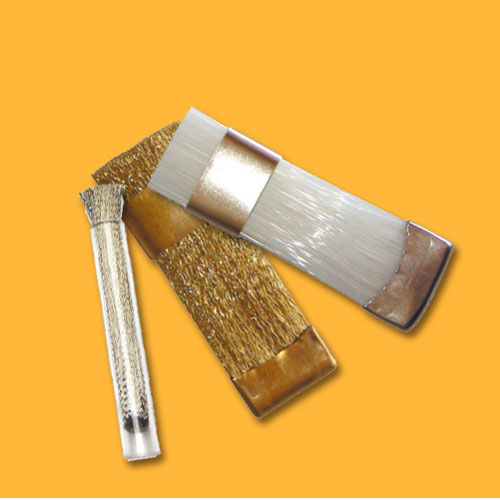
2.Rough polishing of fine & difficult to reach area.
Using miniature brush, or the lathe brush, together with rough polishing compound(usually white color)Brushes must reach all the small & fine details of the ring, especially gaps. The first thing to pay attention to during operation is to apply the compound to the brush hair evenly. The polishing force should be appropriate, otherwise the file marks, abrasions, etc. will be still here

3.Rough polishing of front&side edges.
Using yellow muslin bufftogether with rough polishing compound(usually white color)
When polishing, try to make the ring parallel to the buff, hold the ring with both hands and move the cloth wheel from top to bottom. Polishing must be evenly at one time for the all ring, and each part must be polished into place until it is flat and shiny.
And it also removes the scratches left by the previous process.

4.Fine polishing of front & side edges, kind of “big area”.
Using white muslin bufftogether with fine polishing compound(usually yellow or green color)
Polishing the whole ring all over again. It is required to remove the scratches on the area of diamond cutting, keep the edges and corners of diamond cutting area, and make the that bright and refracted.

5.Put the ring in the ultrasonic cleaner, then rinse with clean water
After all processes above, hanging the ring, better use the brass wire and pass it through the gap of the ring, to avoid friction. Dipping the ring into the boiled dewaxing solution and keep 10-20min, and then put the ring into a ultrasonic cleaner to clean again for 5-10min. Washing the ring after ultrasonic cleaning with water.If there is still compound in the ring gap, you can use a fneedle to remove that, and repeat the 5th process.
Lastly, put the ring in boiling water for about 1 minute, pick it up and dry it with a hair dryer, put it in a tray, and wait for the inspector's inspection.
Important TIPS:
①After each step of the polishing, better using the wax remover to remove the compound, avoid that affecting the result of the next polishing process.② For all polishing progress, do not apply too much compound each time, to avoid the compound from heating and causing it to melt and cover the jewelry surface, and to hide various marks and pits on the jewelry surface, effecting the result of polishing.
③In the rough polishing step, there are several kinds of tools to remove the scratches or make the surface to be flat & smooth. Such as miniature sandpaper roll

1. Put the ring in the ultrasonic cleaner, then rinse with clean water
After all processes above, hanging the ring, better use the brass wire and pass it through the gap of the ring, to avoid friction. Dipping the ring into the boiled dewaxing solution and keep 10-20min, and then put the ring into a ultrasonic cleaner to clean again for 5-10min. Washing the ring after ultrasonic cleaning with water.
If there is still compound in the ring gap, you can use a needle to remove that, and repeat the 5th process.
Lastly, put the ring in boiling water for about 1 minute, pick it up and dry it with a hair dryer, put it in a tray, and wait for the inspector's inspection.
Common Problems And Solutions In the Polishing Process
- The surface of the jewelry is prone to trachoma and pores after being polished.
When grinding, pay attention to whether it meets the technical requirements, can not let trachoma appears, can't just care about polishing, not check, when the ring is polished, the print on the ring is gone, causing unnecessary loss.
- The diamond cutting surface of the jewelry has no edges or dullness.