

Industry News
How to Polish Metal to a Mirror Finish Step-by-Step
Achieving a flawless, liquid-like mirror finish on car parts, knives, or jewelry adds immense value and appeal. Polishing is not magic; it is a systematic process of refining surface scratches from coarse to fine. By smoothing the metal until it produces specular reflection, you create a perfect shine. With the right techniques, even beginners can achieve professional-grade results at home.
Ready to elevate your craft? High-quality results require high-quality tools. Visit the Orobrush Official Website today to shop our premium polishing wheels, sandpaper kits. Get the tools the experts use and start shining today!
Tools and Materials List
To get started, you must gather the right consumables. Using the wrong wheel or compound is the most common reason for a dull or "hazy" finish.
| Category | Key Materials | Core Points |
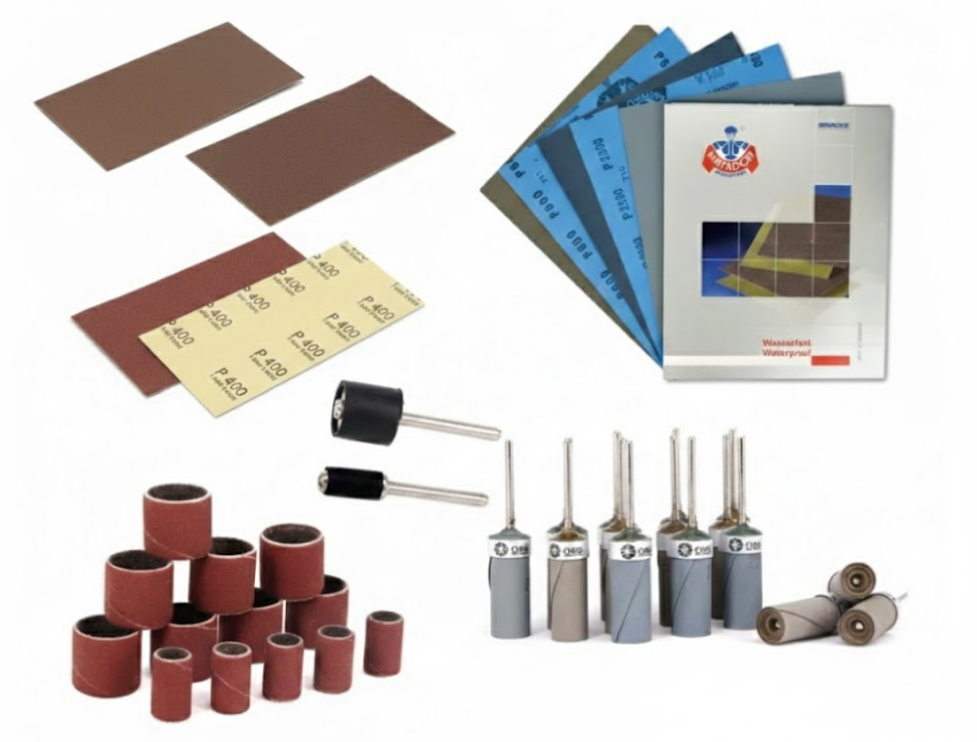
| Sanding Kit | Wet/Dry Sandpaper (400 - 5000 grit) | The foundation; removes deep pits and levels the metal surface. |
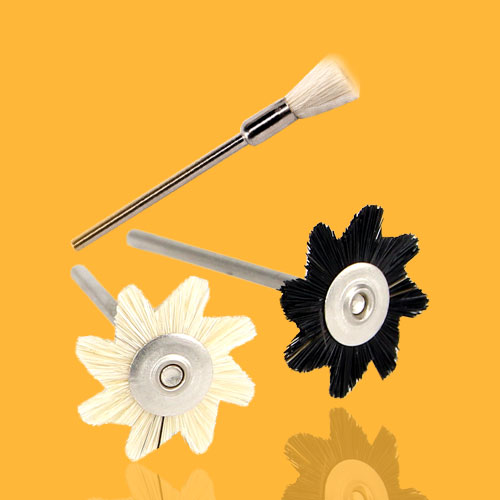
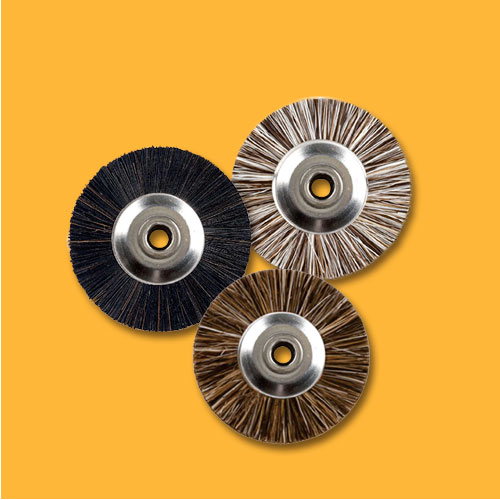
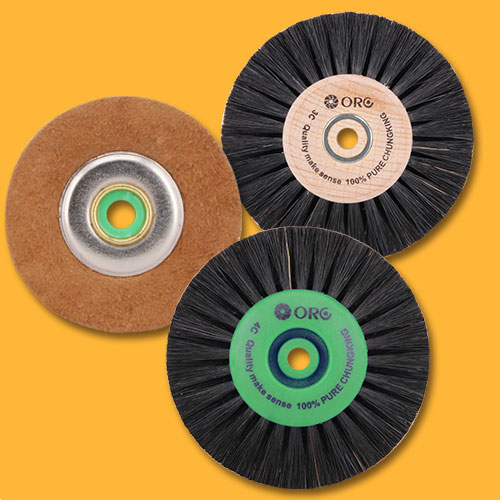
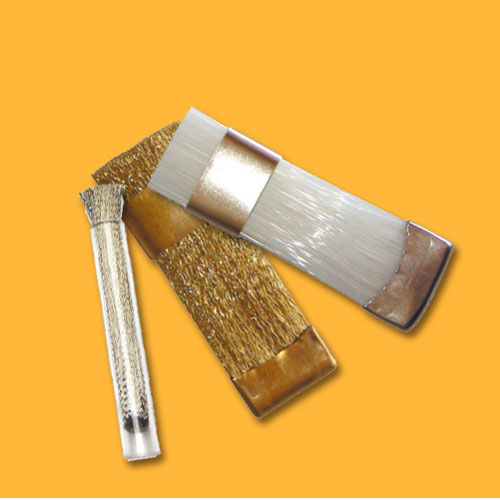
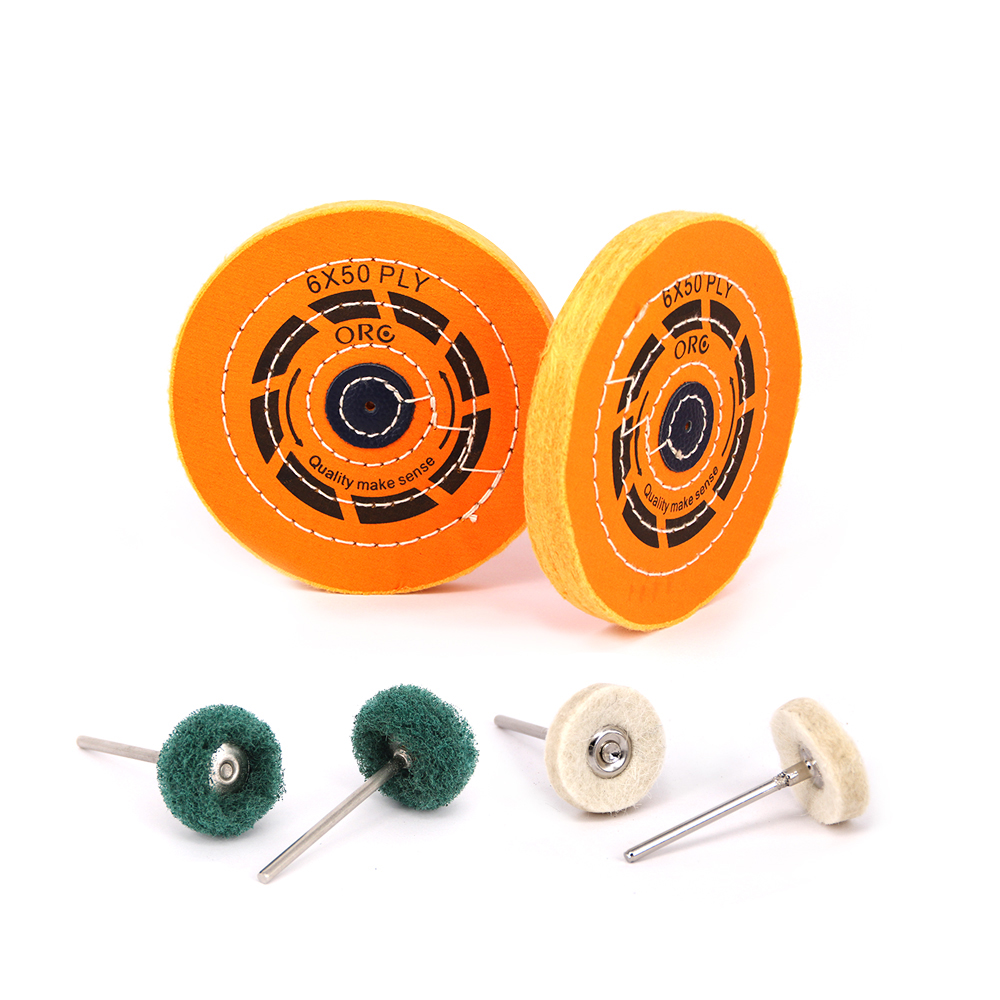
| Polishing Wheel Kit | Sewn Hard Cloth Wheel & Loose Soft Cloth Wheel | Hard wheels provide the "cut" to remove sand scratches; soft wheels provide the final "color." |
| Polishing Compound | Red, Green, White, and Blue Compounds | Each color represents a specific abrasive grade. |
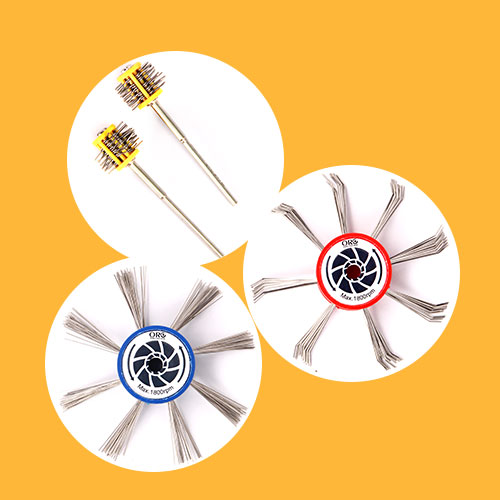
| Power Tools | Bench Polisher, Angle Grinder, or Drill | The "engine" of the process; requires corresponding adapters for each tool. |
| Cleaning/Protection | Alcohol, Microfiber Cloth, Safety Gear | Prevents cross-contamination and ensures a dust-free, safe workspace. |
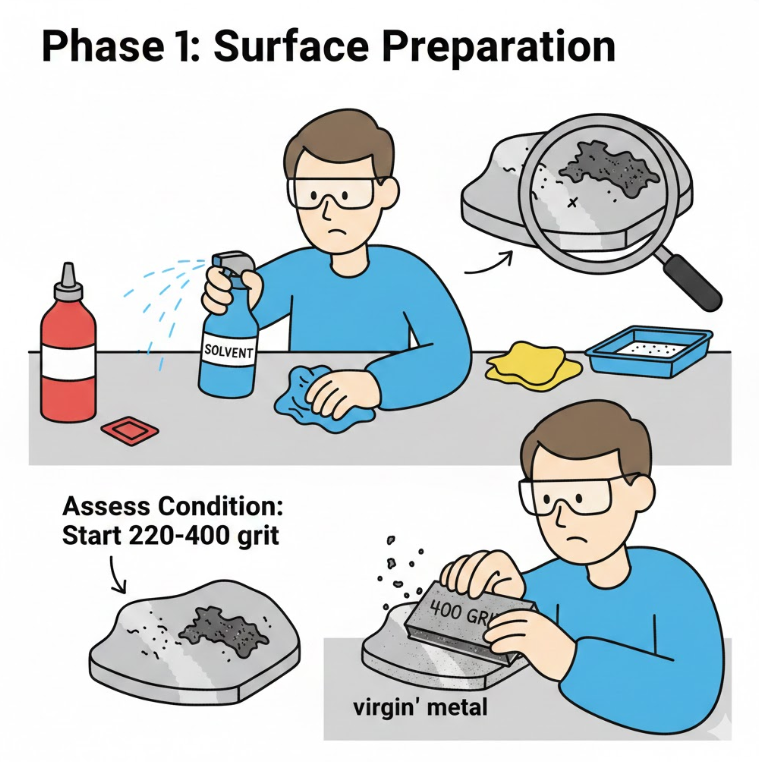
Phase 1: Surface Preparation and Coarse Sanding
Before you ever touch a polishing wheel, the metal surface must be structurally sound.
- Thorough Cleaning: Use a solvent to remove every trace of oil, grease, or wax. Any residue left behind will clog your sandpaper and create uneven marks.
- Assess the Condition: Inspect the metal for deep nicks. If scratches are severe, do not skip the coarse steps. Start with 220 or 400 grit sandpaper to ensure all visible deep defects are leveled.
- Key Point: Ensure all old paint or heavy oxidation layers are entirely removed in this step. This clean "virgin" metal is the only foundation that allows for a perfect mirror finish.
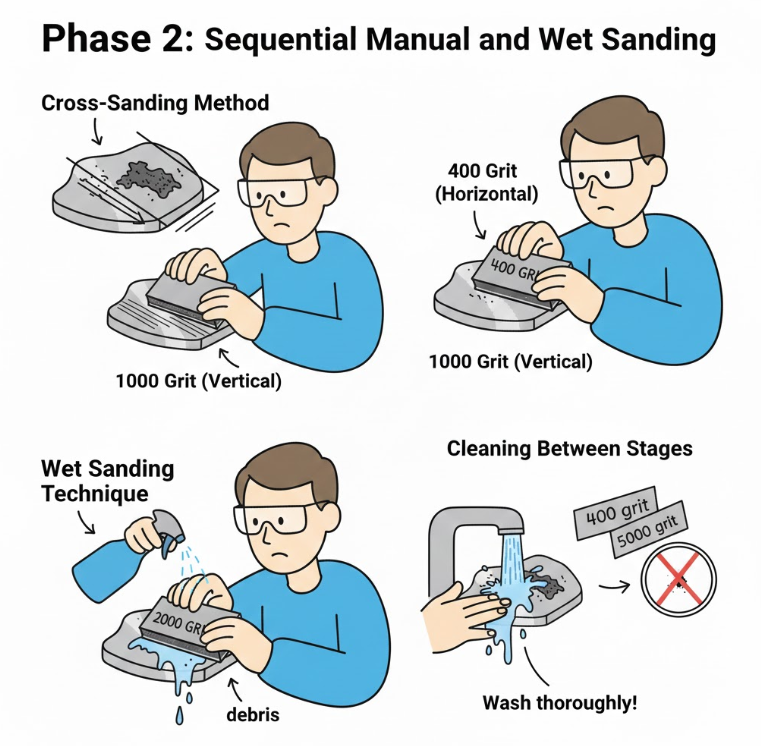
Phase 2: Sequential Manual and Wet Sanding
This is the most labor-intensive part, but it dictates the final quality of the reflection.
- The Cross-Sanding Method: Sand in one direction with your current grit (e.g., horizontally). When you move to the next finer grit, sand at a 90° angle (vertically). This allows you to clearly see when the coarser scratches from the previous stage have been completely replaced by the finer ones.
- Wet Sanding Technique: Apply water or cutting fluid during sanding. This cools the metal to prevent deformation and flushes away debris, significantly improving efficiency.
- Cleaning Between Stages: Crucial Step! Before switching to finer sandpaper, thoroughly wash the part. A single grain of coarse 400-grit sand trapped under a 3000-grit sheet will ruin the next stage of work.
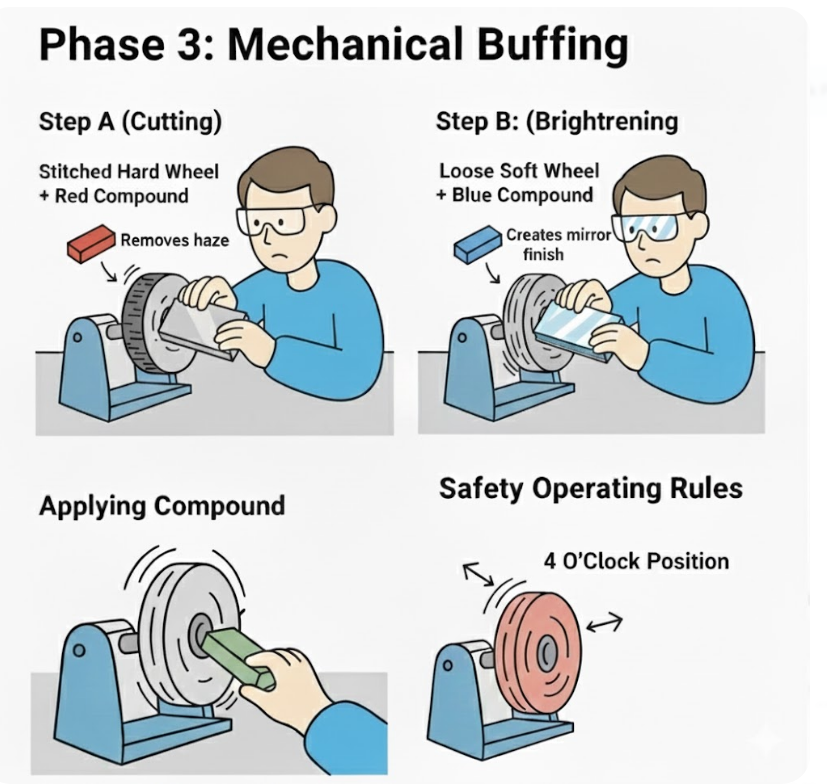
Phase 3: Mechanical Buffing
Now that you have a smooth, satin finish from your 5000-grit paper, it is time to move to mechanical tools.
Matching Wheels and Compounds
Mechanical polishing is a two-step process:- Step A (Cutting): Install a stitched hard cloth wheel and apply red or green coarse compound. This aggressive combination "cuts" the metal to remove the microscopic haze left by the sandpaper.
- Step B (Brightening): Switch to a loose soft cloth wheel and use blue or white fine compound. This step enhances the depth of the reflection, creating the "black" mirror look.
Proper Technique
- Applying Compound: Start your power tool and lightly touch the rotating edge of the wheel to the compound block for 2–3 seconds. The frictional heat "picks up" the wax. Avoid over-loading; you only need a thin, even layer.
- Safety Operating Rules:
- 4 O’Clock Position: Always contact the part on the lower half of the wheel (the 4 to 6 o’clock area). This prevents the wheel from "grabbing" the part and throwing it at you.
- Constant Movement: Do not stay in one spot. Power tools generate intense heat which can burn the metal or cause permanent discoloration.
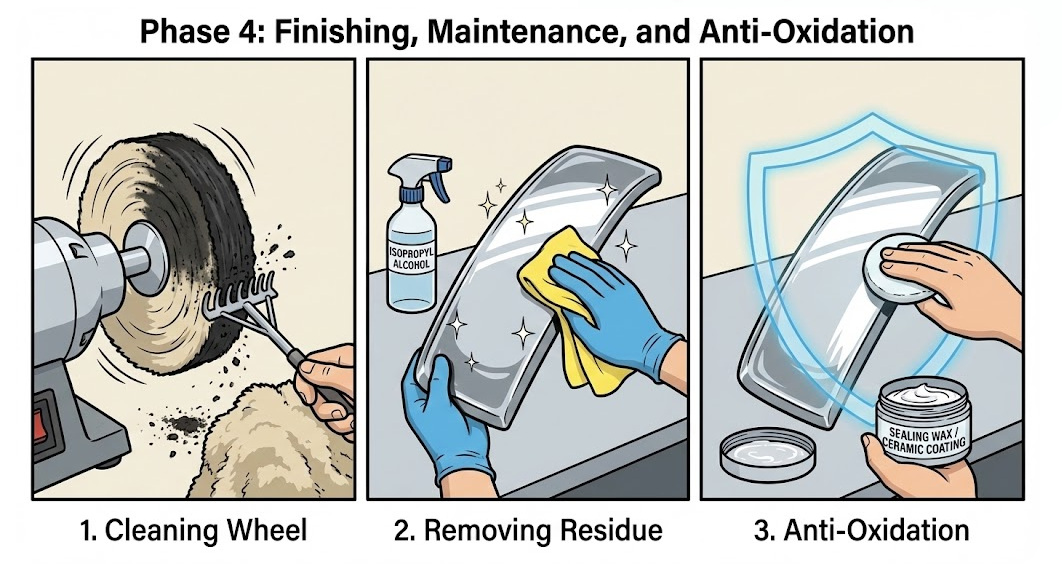
Phase 4: Finishing, Maintenance, and Anti-Oxidation

- Cleaning the Polishing Wheel: If the wheel becomes blackened and caked with old wax, lightly scrape the edge with a metal piece or "rake" while it is rotating to restore its fluffy, compound-grabbing state.
- Removing Residue: Compounds are oily. Wipe the metal clean with isopropyl alcohol and a microfiber cloth to inspect your work.
- Anti-Oxidation: Polished metal is extremely delicate. To prevent re-oxidation and tarnishing, apply a sealing wax or a ceramic coating immediately. This locks in the shine for months.
Professional Advice
- Safety First: Never wear loose clothing, gloves with loose threads, or jewelry when operating high-speed power tools.
- Dedicated Wheels: Use one wheel per color of compound. Marking your wheels prevents cross-contamination, which is the cause of mystery scratches in a mirror finish.
- Material Awareness: Aluminum is soft and reaches a mirror finish quickly but burns easily under heat. Stainless steel is much harder and requires a firm stitched wheel and more "cutting" time.
Conclusion
Achieving a professional-grade mirror finish is a rewarding journey of precision and patience. By systematically refining the surface from the first 400-grit sand to the final buff with a soft cloth wheel, you can transform any dull metal into a masterpiece.Ready to elevate your craft? High-quality results require high-quality tools. Visit the Orobrush Official Website today to shop our premium polishing wheels, sandpaper kits. Get the tools the experts use and start shining today!