

Industry News
Common Jewelry Polishing Mistakes and How to Fix Them
Polishing is the final, crucial step that determines a jewelry piece's ultimate commercial value. However, a single improper technique at the bench can ruin hours of painstaking modeling and delicate stone setting in seconds. Mastering subtle parameter adjustments separates premium merchandise from costly workshop scrap.
When working under a directional light source, employ a directional change. If the previous step involved horizontal polishing, adjust the subsequent step to a vertical orientation. If horizontal lines are still visible in the vertical polish, the coarse scratches remain. Do not proceed to the next step.
Buff Dressing
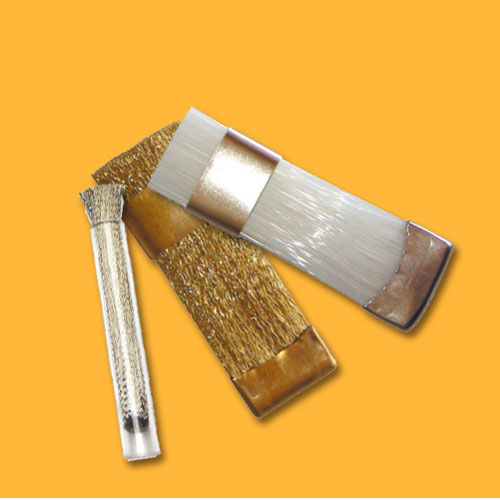
Before using a new buff wheel, or if hardened clumps form on an old wheel, you must loosen the surface. Use a wheel rake or a used saw blade to comb the fibers. Otherwise, the hardened clumps will directly scratch your precious metal.
Safety Tip
When polishing chains or dangling pendants, never pull them directly by hand. Always wrap them securely around a wooden ring mandrel. This prevents the chain from being caught in the high-speed buff wheel, avoiding serious hand injury.
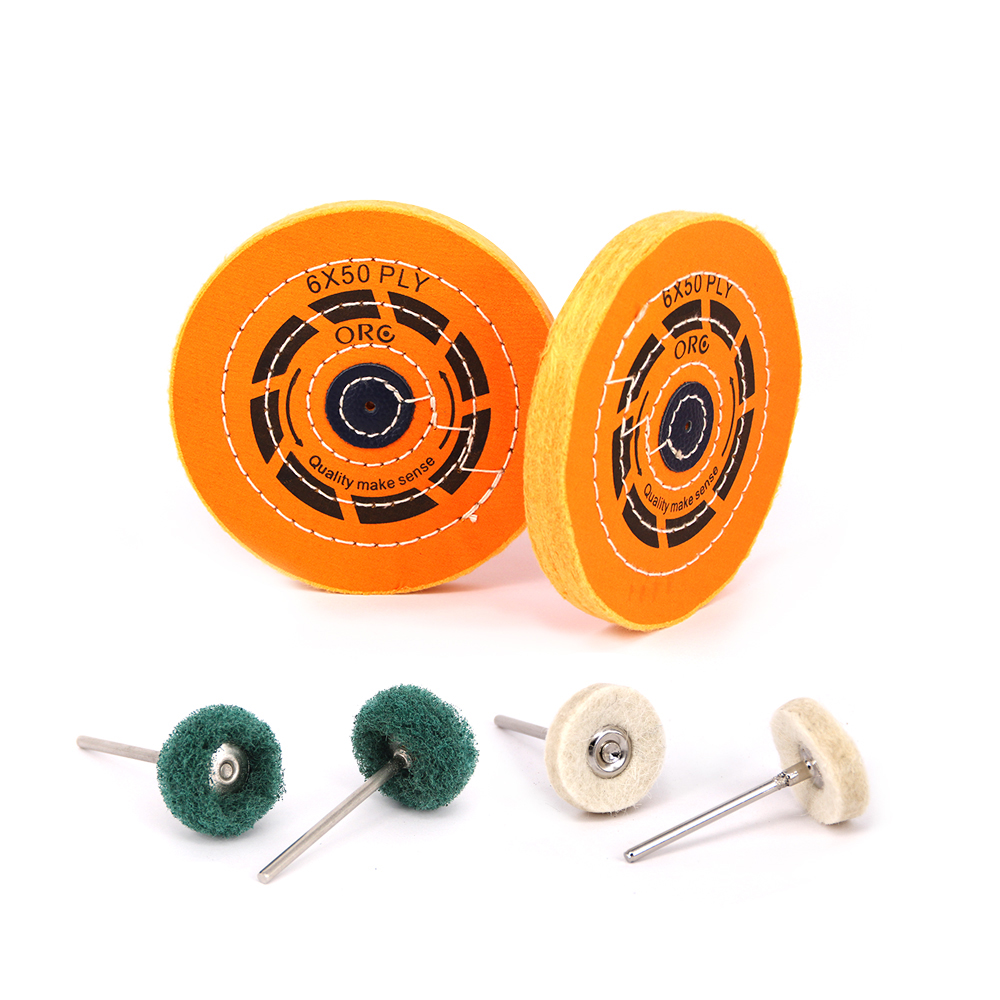
Achieving a flawless, high-grade mirror finish requires professional bench equipment that delivers consistent results. To upgrade your workshop setup, explore the professional-grade collection of precision brushes, buffs on the Orobrush website today to source tools that protect your craft.
Core Section: 5 Common Mistakes & Practical Fixes
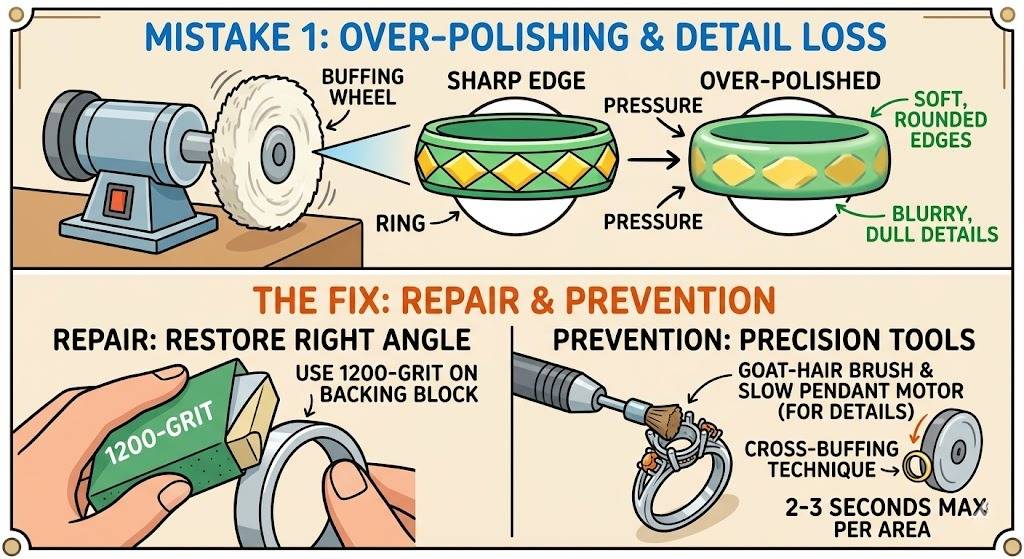
Mistake 1: Over-Polishing and Loss of Sharp Detail

Symptoms
Sharp edges become rounded and dull. Intricate engravings or hallmarks blur. Sharp diamond-cut facets lose their light-refracting brilliance entirely.Root Causes
Dwelling too long on a single spot causes this. Applying continuous pressure with an overly aggressive buffing wheel also melts away crisp geometry.The Fix
- Repair: If the edge has become rounded, manually restore the right angle. You can true the wall using 1200-grit sandpaper on a hard backing block. Follow this with a very light final polish.
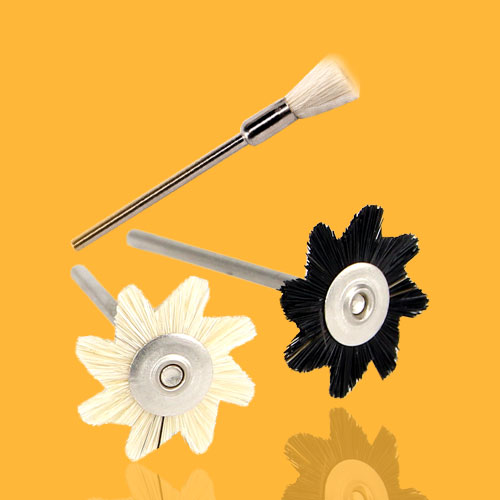
- Prevention: Use the cross-buffing technique. Ensure the buffing wheel passes over any single area for no more than 2–3 seconds. For intricate details, switch to a slow-speed pendant motor. Equip it with a miniature goat-hair brush for precise, localized control.
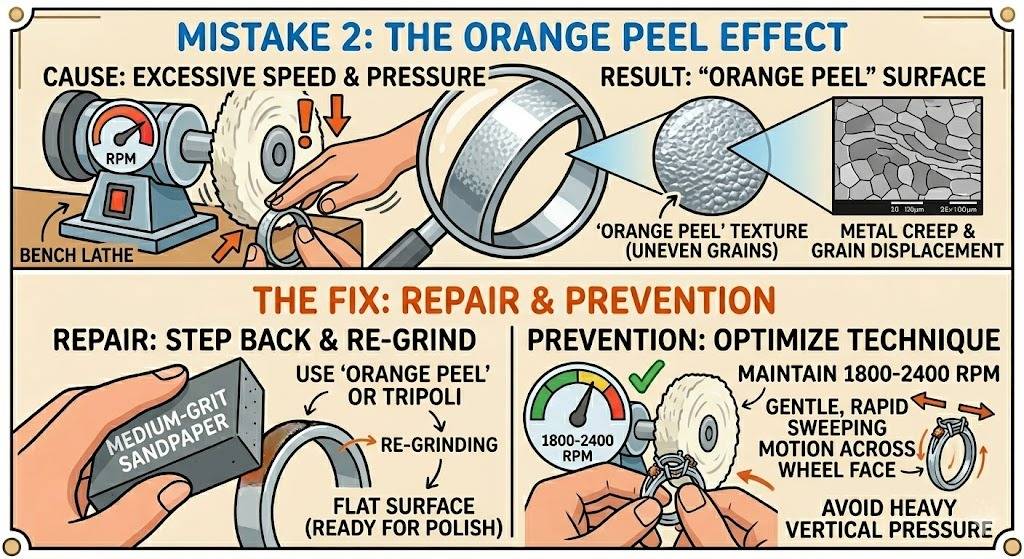
Mistake 2: The "Orange Peel" Effect

Phenomenon
The polished metal surface resembles orange peel. It looks uneven and textured. This texture fails to achieve a perfectly flat, mirror-like finish.Root Cause
Excessive polishing machine speed causes this error. When bench lathe speeds exceed 3000 RPM, localized overheating occurs. This thermal stress leads to fatigue and displacement of the metal grains, known as creep.The Fix
- Repair: You must step back. Use medium-grit sandpaper or a crisp Tripoli compound to re-grind the surface. Completely remove the orange peel layer until the surface is flat again.
- Prevention: Strictly maintain the bench polisher speed between 1800 and 2400 RPM. Avoid applying heavy vertical pressure to the workpiece. Opt instead for a gentle, rapid sweeping motion across the wheel face.
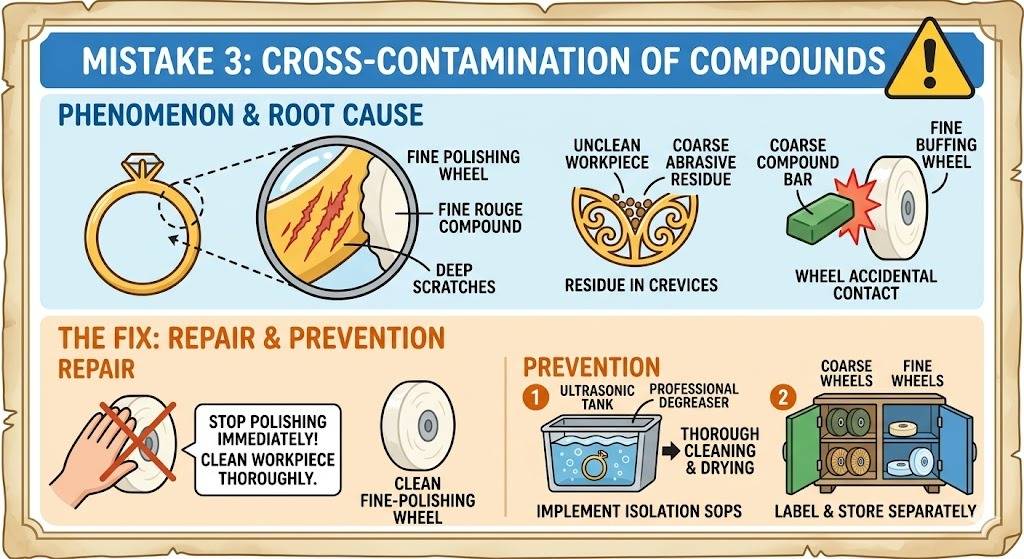
Mistake 3: Cross-Contamination of Compounds

Phenomenon
During the final mirror-polishing stage, inexplicable deep scratches keep appearing on the metal surface. It looks increasingly marred despite continuous finishing.Root Cause
Coarse abrasive residue from the rough polishing step remains in the jewelry's crevices. Alternatively, the fine-polishing buffing wheel accidentally comes into contact with coarse polishing compound. This introduces stray coarse particles directly into the fine-polishing process.The Fix
- Repair: Stop polishing immediately. Thoroughly clean the workpiece. Switch to a completely clean, uncontaminated fine-polishing wheel to resume work.
- Prevention: Implement strict Standard Operating Procedures for isolation. Between each stage, the workpiece must be thoroughly cleaned in an ultrasonic cleaner using a professional degreasing agent, then dried. Store different polishing wheels separately and label them clearly as Coarse or Fine.
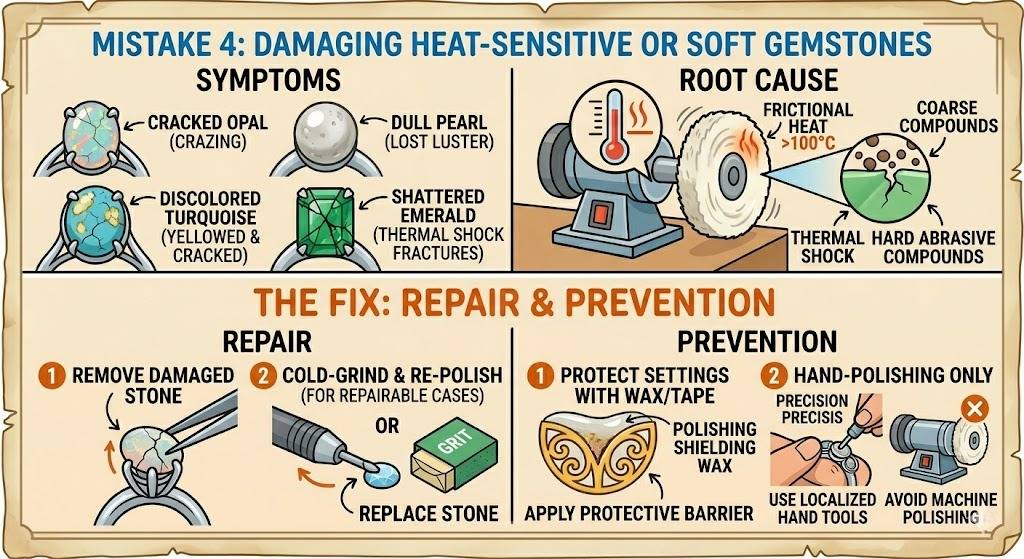
Mistake 4: Damaging Heat-Sensitive or Soft Gemstones

Symptom
Gemstones set in the piece lose their luster. Opals, pearls, turquoise, or emeralds develop surface cracks or shatter completely after polishing.Root Cause
Frictional heat is the culprit here. The high-speed rotation of the bench polishing wheel can instantly exceed 100°C. This thermal shock causes rapid cracking. Additionally, high-hardness polishing compounds can directly scratch softer, low-Mohs gems.The Fix
- Repair: Once a natural gemstone’s surface is heat-cracked, it is permanent. The stone usually must be removed for cold grinding and polishing. In worst cases, it must be discarded and replaced.
- Prevention: Protect your settings. Before polishing, completely cover the gemstone with specialized polishing shielding wax or heat-resistant tape. Alternatively, forgo machine polishing. Use meticulous hand-polishing sticks on the metal surrounding the stone.
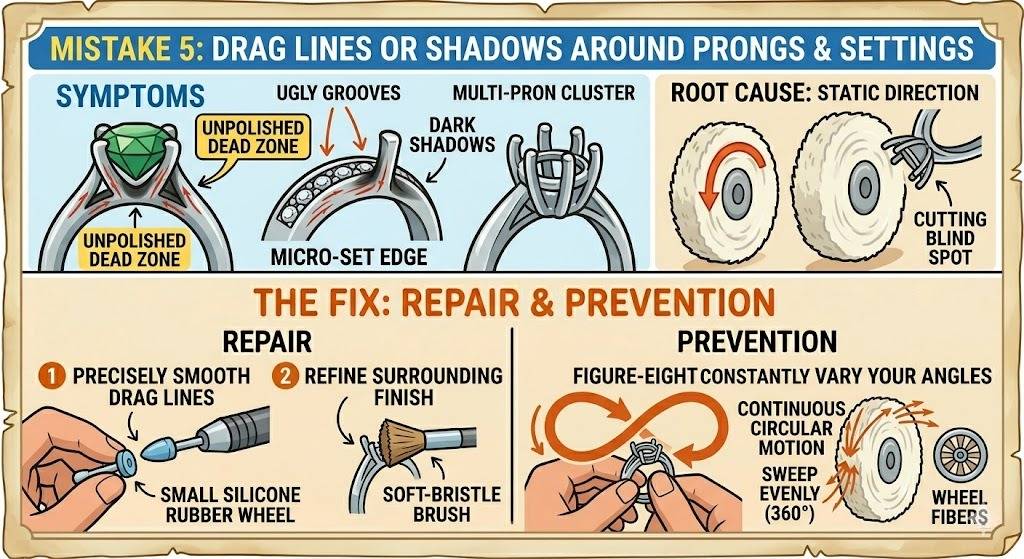
Mistake 5: Drag Lines or Shadows Around Prongs and Settings

Symptom
Ugly grooves running in the direction of the polishing stroke appear. Unpolished dead zones or dark shadows form right behind the prongs or micro-set edges.Root Cause
This happens when the polishing wheel's direction remains static. The buffing wheel skips when it hits raised prongs. This creates a cutting blind spot while causing over-cutting directly behind the prong.The Fix
- Repair: Use small silicone rubber wheels to precisely smooth out the drag lines. Then, refine the surrounding finish with a soft-bristle brush.
- Prevention: Constantly vary your angles. Change the point of contact between the workpiece and the buffing wheel. When polishing prongs, move the piece in a continuous circular or figure-eight motion. This allows the wheel's fibers to sweep evenly across the prong tips from all 360 degrees.
Pro-Tips: The Bench Jeweler’s Checklist
Visual InspectionWhen working under a directional light source, employ a directional change. If the previous step involved horizontal polishing, adjust the subsequent step to a vertical orientation. If horizontal lines are still visible in the vertical polish, the coarse scratches remain. Do not proceed to the next step.
Buff Dressing
Before using a new buff wheel, or if hardened clumps form on an old wheel, you must loosen the surface. Use a wheel rake or a used saw blade to comb the fibers. Otherwise, the hardened clumps will directly scratch your precious metal.
Safety Tip
When polishing chains or dangling pendants, never pull them directly by hand. Always wrap them securely around a wooden ring mandrel. This prevents the chain from being caught in the high-speed buff wheel, avoiding serious hand injury.
Conclusion
Jewelry polishing is an art of controlling temperature, speed, and angle. By establishing strict cleaning habits and parameter awareness, you can reduce your workshop scrap rate to 0%. Furthermore, proper technique significantly reduces precious metal loss, improving the overall profitability of your workshop.Achieving a flawless, high-grade mirror finish requires professional bench equipment that delivers consistent results. To upgrade your workshop setup, explore the professional-grade collection of precision brushes, buffs on the Orobrush website today to source tools that protect your craft.