

Industry News
Guide to Sanding & Polishing for Jewelry Making
To truly bring a piece of jewelry to life and make it sparkle, the final steps of sanding and polishing simply complete the process. These actions transform raw metal and rough surfaces into gleaming, beautiful works of art. Without proper sanding and polishing, even the most intricate designs can appear dull and unfinished.
This comprehensive guide will take you through everything you need to know about mastering these essential skills, from the underlying theory and necessary jewelry polishing tools to detailed step-by-step techniques and solutions for common problems. Whether you're a beginner or looking to refine your existing skills, you'll find practical advice to help you achieve professional-grade results.
This comprehensive guide will take you through everything you need to know about mastering these essential skills, from the underlying theory and necessary jewelry polishing tools to detailed step-by-step techniques and solutions for common problems. Whether you're a beginner or looking to refine your existing skills, you'll find practical advice to help you achieve professional-grade results.

Understanding Sanding and Polishing: The Basics
While often grouped together, sanding and polishing are distinct processes, each with its own purpose in transforming your jewelry. Understanding how they work is key to achieving a perfect finish.Sanding: The Subtractive Process
Sanding is primarily a subtractive process aimed at removing surface defects. Imagine your jewelry piece fresh off the workbench – it likely has scratches from filing, tool marks, and general surface unevenness. Sanding uses abrasives to systematically remove these imperfections. You start with coarser abrasives to tackle deeper marks and gradually move to finer ones, progressively refining the surface until it's smooth and flat. Each sanding step removes the scratches left by the previous, coarser abrasive, preparing the surface for the next stage.Polishing: The Finishing Process
Polishing, on the other hand, is a finishing process that takes over where sanding leaves off. It uses much finer abrasives, often suspended in polishing compounds, to reduce microscopic unevenness on the surface. Instead of removing large amounts of material, polishing aims to create an incredibly smooth, reflective surface that achieves a mirror-like luster. This process truly brings out the inherent beauty and shine of the metal.The Principle of Abrasives: Understanding Grit
The effectiveness of both sanding and polishing hinges on the concept of grit. "Grit" refers to the size of the abrasive particles. It's often counterintuitive, but the larger the grit number, the finer the abrasive particles. This means a 220-grit sandpaper has much coarser particles than a 2000-grit sandpaper.- Lower grit numbers (e.g., 220, 400) indicate coarser abrasives designed for aggressive material removal and shaping.
- Higher grit numbers (e.g., 1000, 2000, 4000+) signify finer abrasives, used for progressively smoothing the surface and preparing it for a high polish.
Preparation: Sharpening the Knife Doesn't Delay Chopping Wood
Before you even think about touching your jewelry with abrasives, good preparation is really helpful. Having the right jewelry polishing tools and a well-organized workspace can save you time, prevent unnecessary headaches, and help keep you safe.Personal Protective Equipment (PPE)
Your safety is paramount. Always wear:- Goggles: To protect your eyes from flying debris and dust.
- Dust Masks: Especially crucial when working with silver dust, polishing compounds, and other fine particles that can irritate your respiratory system.
- Gloves: To protect your hands from abrasions and chemicals, and to keep fingerprints off your polished pieces.
- Aprons: To protect your clothing from dust and polishing compounds.
Basic Tools for Jewelry Polishing
- Sandpaper/Sanding Files: You'll need a range of grits, typically starting from 220 or 320 for rough work, then progressing through 400, 600, 800, 1000, 1500, 2000 grit, and even higher (e.g., 2500, 4000) for very fine finishes. These come in sheets, sticks, or on rubber wheels.
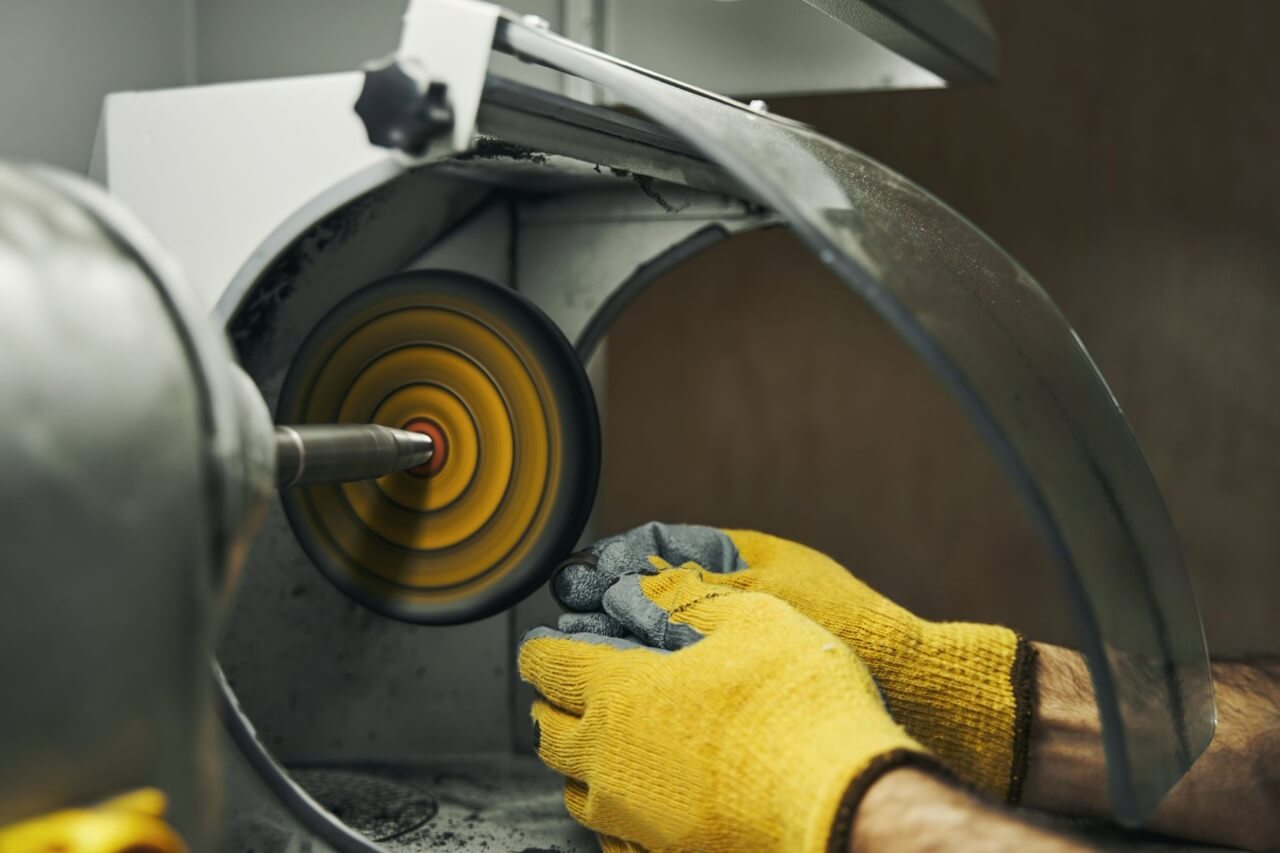
- Polisher/Micromotor:
- Benchtop Polisher: A larger, more powerful machine with two spindles for attaching various polishing wheels. Ideal for workshops with regular high-volume polishing.
- Micromotor (Rotary Tool): A handheld, versatile tool (like a RHJC) that allows for more precise control, especially for smaller pieces or intricate details. Many jewelry polishing tools attachments are available for micromotors.
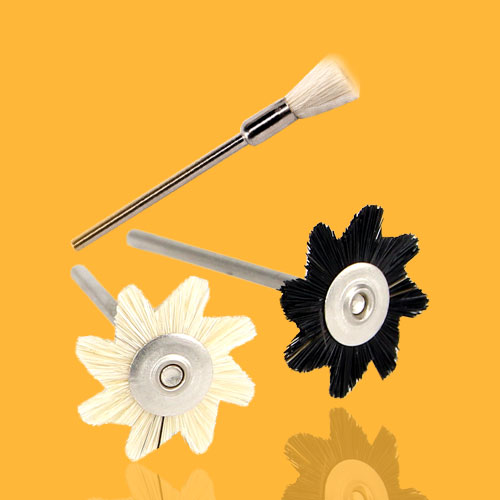
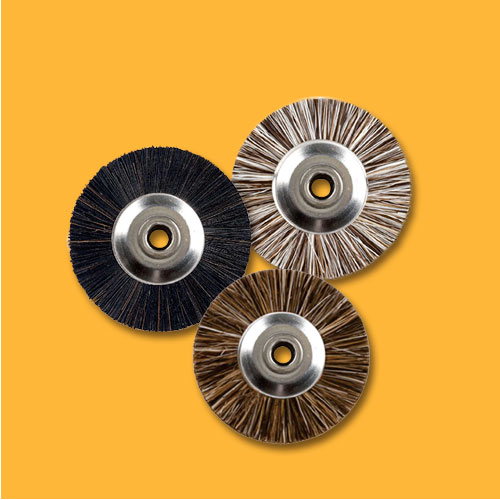
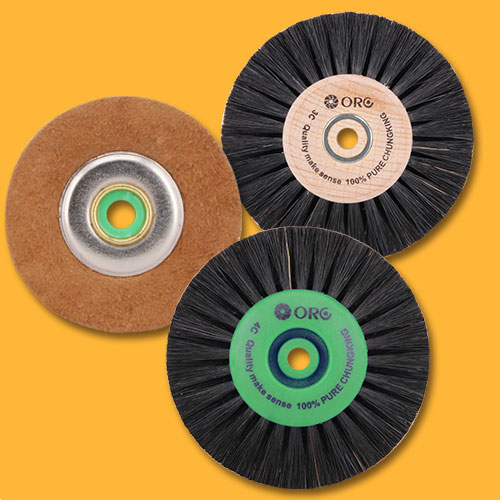
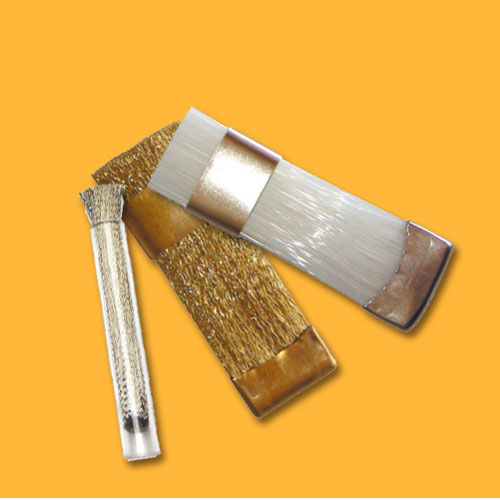
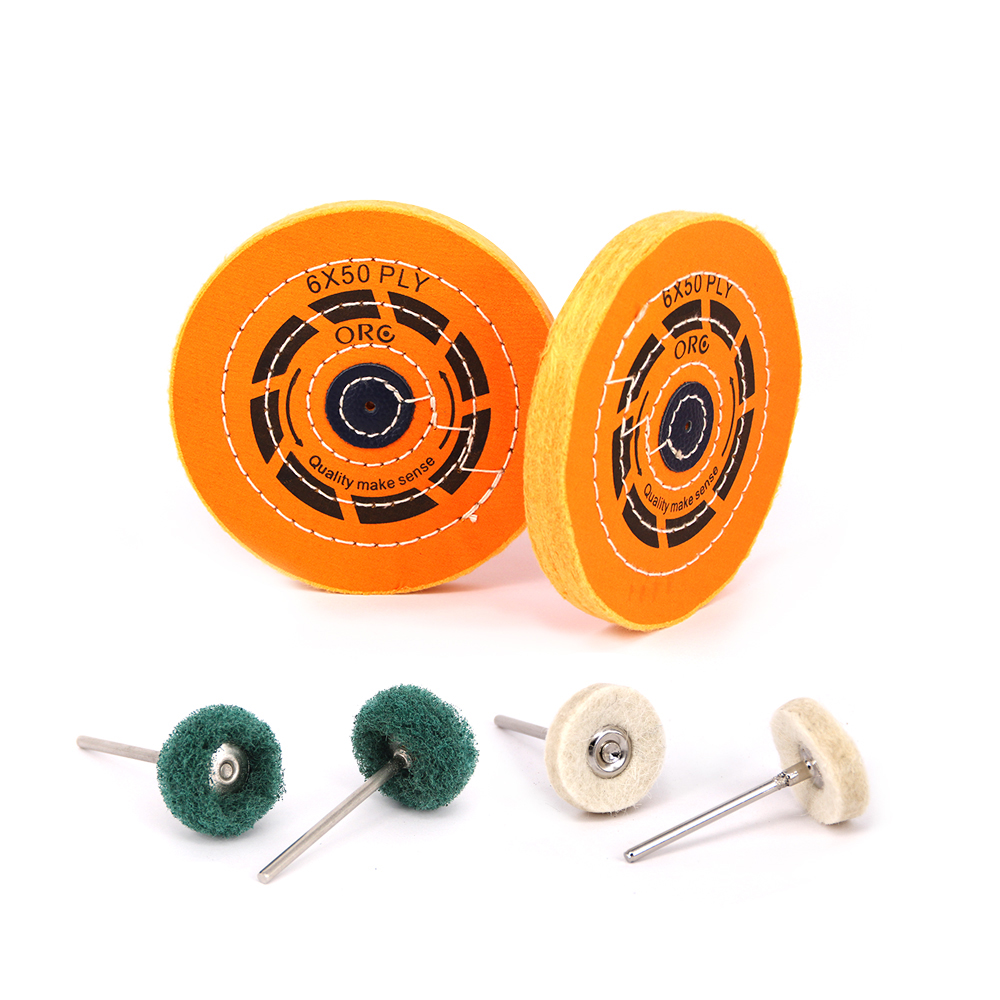
- Polishing Wheels/Buffs: These come in various materials and shapes, each suited for different stages and types of polishing. Common types include:
- Cotton Wheels: Versatile for most polishing stages.
- Felt Wheels: Good for harder metals and reaching into intricate areas.
- Wool Wheels: Often used for final high-luster polishing.
- Muslin Buffs: Popular for general polishing.
- Polishing Pastes/Polishing Wax: These compounds contain abrasive particles and are applied to the polishing wheels. They are color-coded to indicate their coarseness:
- Brown (Tripoli): Coarse, for initial cutting and removing deeper scratches.
- White (Rouge/Bobbing Compound): Medium-coarse, for general polishing.
- Blue (All-Purpose): Often a good all-rounder for various metals.
- Green (Chrome Rouge): Very fine, for achieving a high mirror finish, especially on harder metals.
- Red (Jeweler's Rouge): Extremely fine, traditionally used for gold and silver to achieve a brilliant shine.
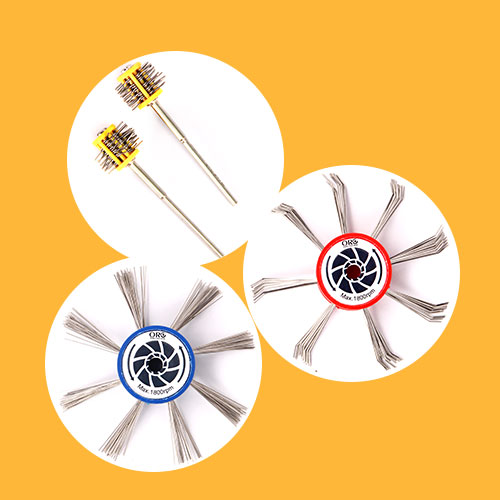
- Other Auxiliary Tools:
- Polishing Pliers: To hold small pieces securely.
- Rubber Wheels: Excellent for pre-polishing and removing light scratches on curved surfaces.
- Small Brushes: For cleaning intricate details.
- Ultrasonic Cleaner (Optional but Recommended): Invaluable for thoroughly removing polishing compound residue from complex pieces.
- Alcohol or Soapy Water: For cleaning between steps.
Work Area Preparation
Ensure your workspace is:- Clean: Free of dust and debris that could scratch your piece.
- Well-Lit: Good lighting is essential for seeing scratches and assessing your progress.
- Well-Ventilated: To disperse dust and fumes from polishing compounds. A dust collector is highly recommended if you do a lot of polishing.
Step-by-Step: Detailed Explanation of Jewelry Polishing Steps
This is the central part of jewelry polishing. Follow these steps meticulously, knowing that patience and a focus on detail are key to success.Step 1: Rough Sanding & Shaping
- Purpose: To remove the deepest file marks, soldering marks, and significant surface unevenness. This is where you establish the basic smoothness.
- Method: Begin with your lowest grit sandpaper or sanding file (e.g., 220-400 grit). Apply even pressure and sand in one consistent direction.
- Tips:
- Ensure all deep scratches from previous metalworking are completely gone before moving to the next grit.
- Avoid sanding in circles, as this can create circular scratches that are difficult to remove later. Stick to straight, unidirectional strokes.
Step 2: Medium Sanding
- Purpose: To eliminate the shallower scratches left by the rough sanding stage and prepare the surface for finer work.
- Method: Switch to gradually higher grit sandpaper (e.g., 600-1000 grit). Crucially, with each change in grit, sand in a direction perpendicular to the previous stage's scratches. This makes it easy to see and confirm that you've removed all marks from the previous grit.
- Tips: Visually inspect the piece under good lighting to ensure no marks from the previous, coarser grit remain. If you see any, go back to the previous grit and continue sanding until they are gone.
Step 3: Fine Sanding/Pre-Polishing
- Purpose: To make the surface incredibly smooth, achieving a nearly matte or satin effect, and to prepare it for the actual polishing compounds.
- Method: Progress to very high-grit sandpaper (e.g., 1200-2500 grit or higher). Continue sanding until no visible scratches remain, only a uniform, smooth surface.
- Tips:
- For an even more delicate surface and to reduce dust, you can wet sand. Dip your sandpaper in clean water or spray the piece lightly as you sand. This lubricates the surface and helps achieve a finer finish.
- At this stage, the surface should look uniformly dull or matte, with no discernible individual scratches.
Step 4: Rough Polishing
- Purpose: To eliminate the tiny marks left by fine sanding and to start bringing out the initial shine. This is where the metal truly begins to reflect.
- Method: Apply a coarse polishing paste (like Tripoli or white compound) to a suitable polishing wheel (e.g., a hard cotton cloth wheel). Use a medium speed on your polisher.
- Tips:
- Keep the jewelry moving constantly against the wheel. Dwelling in one spot can cause overheating, which can damage the metal (especially thin areas) or create uneven polishing.
- Apply gentle, consistent pressure. Let the abrasive do the work, not excessive force.
Step 5: Fine Polishing/Final Buffing
- Purpose: To achieve a brilliant, mirror-like gloss that truly makes the jewelry sparkle.
- Method: Change to a clean, soft polishing wheel (e.g., a new cotton wheel, felt, or wool buff) and switch to a fine polishing paste (like green or red rouge). You can often increase the speed slightly for the final polish, but always prioritize control.
- Tips:
- Use gentle pressure and continue to keep the piece moving.
- Regularly check your progress under good light to assess the gloss. Look for any remaining haze or swirl marks.
- Ensure your polishing wheels are clean and dedicated to specific compounds to avoid cross-contamination of grits.
Step 6: Cleaning
- Purpose: To remove all residual polishing paste, dust, and any fingerprints from the polished surface. This final step reveals the true shine.
- Methods:
- Ultrasonic Cleaner: Highly effective for removing embedded compounds from intricate designs.
- Warm Soapy Water & Soft Brush: Gently scrub the piece, especially in crevices, to dislodge paste.
- Polishing Cloth: A soft, lint-free cloth specifically designed for jewelry can be used for a final wipe-down.
- Tips: Thorough cleaning is essential. Any leftover residue will dull the shine and attract dust, negating all your hard work. Ensure the piece is completely dry after cleaning.
Common Problems & Solutions in Jewelry Polishing
Even experienced jewelers encounter challenges. Here are some common issues and how to address them:- Scratches are Still There After Polishing:
- Problem: You likely skipped a grit level during sanding, or didn't completely remove the scratches from the previous stage before moving on.
- Solution: Go back to the last grit where the scratches originated and re-sand carefully, making sure all marks are gone before progressing through the finer grits again.
- Swirls/Haze After Polishing:
- Problem: This often indicates that your polishing paste or polishing wheel is not clean, leading to cross-contamination with coarser particles. It can also be due to inconsistent pressure or speed.
- Solution: Ensure you're using clean, dedicated wheels for each polishing compound. Check your pressure and speed; too much or too little can cause issues. Re-polish with a fresh wheel and compound.
- Overheating of Jewelry:
- Problem: Applying too much pressure or holding the piece in one spot for too long on the polishing wheel. This can discolor or even melt thin areas of the metal.
- Solution: Always keep the piece moving. Use lighter pressure and let the compound do the work. Take breaks to allow the metal to cool if it feels warm.
- Blurred/Worn Details:
- Problem: Too much pressure or using an inappropriate polishing tool (e.g., a large, aggressive wheel) on delicate details.
- Solution: Use smaller, more precise polishing tools (like small buffs on a micromotor) and very light pressure when working on intricate areas. Consider hand-polishing with a cloth for extremely fine details.
- Polishing Paste Residue:
- Problem: Incomplete cleaning after the polishing stage.
- Solution: Utilize an ultrasonic cleaner if possible. Otherwise, thoroughly scrub with warm soapy water and a soft brush, paying close attention to crevices and undercuts. Rinse well and dry completely.
Special Considerations for Different Metals
Different metals react differently to jewelry polishing and require specific care.- Sterling Silver/925 Silver:
- Characteristics: Relatively soft and prone to oxidation (tarnishing).
- Considerations: Requires more frequent polishing to maintain its shine. Be extra careful to clean thoroughly after polishing, as compounds can cause further tarnishing. If the silver has been intentionally oxidized (sulfidated) for an antique look, be very careful not to over-polish, as this will remove the dark patination.
- Gold/K Gold:
- Characteristics: Generally softer than silver, especially higher karat gold (e.g., 22K, 24K).
- Considerations: Be careful not to over-polish, as gold can wear away relatively quickly. Use softer polishing wheels and gentler pressure. Red rouge is traditionally excellent for gold's final polish.
- Copper/Brass:
- Characteristics: Very prone to oxidation and discoloration.
- Considerations: Needs thorough polishing to remove tarnish, and often benefits from a protective coating (like a clear lacquer or wax) after polishing to prevent rapid re-tarnishing.
- Jewelry with Gemstones:
- Considerations: Protect gemstones from high heat, aggressive polishing wheels, and abrasive polishing compounds. Heat can damage some stones (e.g., opals, emeralds, pearls). Polishing compounds can scratch softer stones (e.g., pearls, turquoise) or get lodged in their settings. If possible, set stones after polishing. If not, mask them with tape or a protective coating, and use extreme caution.