

Industry News
How to Choose the Best Felt Bobs for Your Finishing Projects
The wrong felt bob can instantly ruin a nearly finished workpiece. It wastes your money and hours of labor. To avoid costly mistakes, you must evaluate four key factors: your finishing stage, workpiece shape, handpiece shank size, and your polishing compound.
Step 1: Identify Your Polishing Stage
Your felt tool needs change dramatically as your project progresses. Density matters immensely. Manufacturers compress wool fibers at varying pressures to create different hardness levels. This density dictates the cutting power.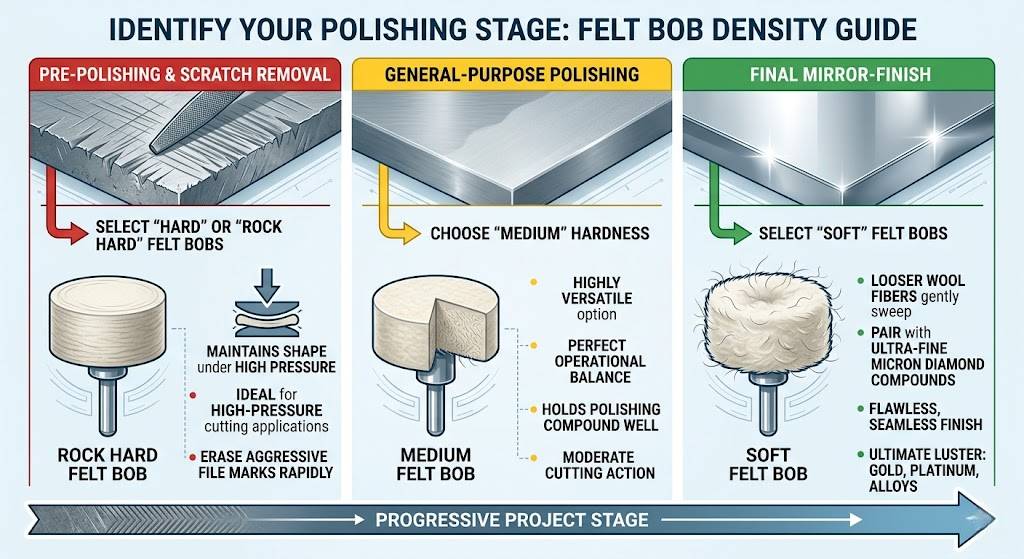
- Pre-Polishing and Scratch Removal: Are you cutting down rough surfaces? Select "Hard" or "Rock Hard" felt bobs. These highly compressed wool tools maintain their shape flawlessly. They do not mush flat under heavy pressure. They are ideal for high-pressure cutting applications. Use them to erase aggressive file marks rapidly.
- General-Purpose Polishing: Need a highly versatile option? Choose "Medium" hardness. This is the most commonly stocked type in most laboratories and workshops. It offers a perfect operational balance. It holds polishing compound well while providing moderate cutting action.
- Final Mirror-Finish: Ready for that flawless high-gloss finish? Select "Soft" felt bobs. The looser wool fibers gently sweep across the metal surface. Pair them with ultra-fine micron diamond compounds. This helps you achieve a flawless, seamless finish. It brings out the ultimate luster in gold, platinum, or precision alloys.
Step 2: Match the Bob Shape to Your Workpiece
Different geometries tackle entirely different mechanical problems. Let the metal guide you. Using the wrong shape creates uneven surfaces or ruins crisp edges.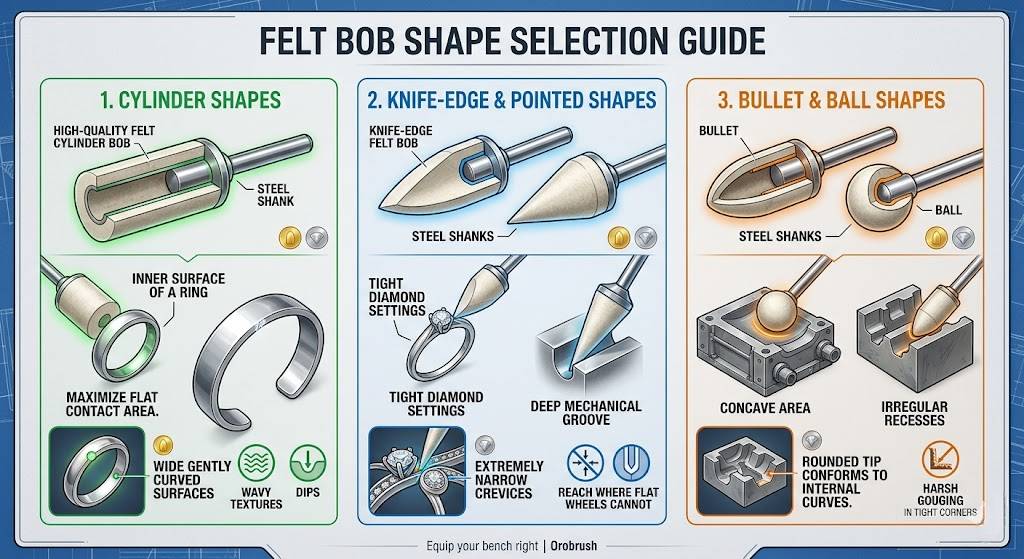
- Cylinder Shapes: Do you need to polish the inner surface of a ring? Working on a large, gently curved silver band? Choose a Cylinder shape. Cylinders maximize the flat contact area. This prevents unwanted dips or wavy textures on wide surfaces.
- Knife-Edge and Pointed Shapes: Are you working on extremely narrow crevices? Polishing delicate jewelry prongs or deep mechanical grooves? Choose a Knife-edge or Pointed shape. They reach exactly where flat wheels simply cannot. A sharp knife-edge easily slips between tight diamond settings.
- Bullet and Ball Shapes: Do you need to polish irregular recesses? Smoothing out concave areas inside a casting mold? Choose a Bullet or Ball shape. The rounded tip conforms naturally to internal curves. This prevents harsh gouging in tight corners.
Step 3: Check Your Handpiece Shank Requirements
Never ignore your micromotor interface. This is a critical mechanical step.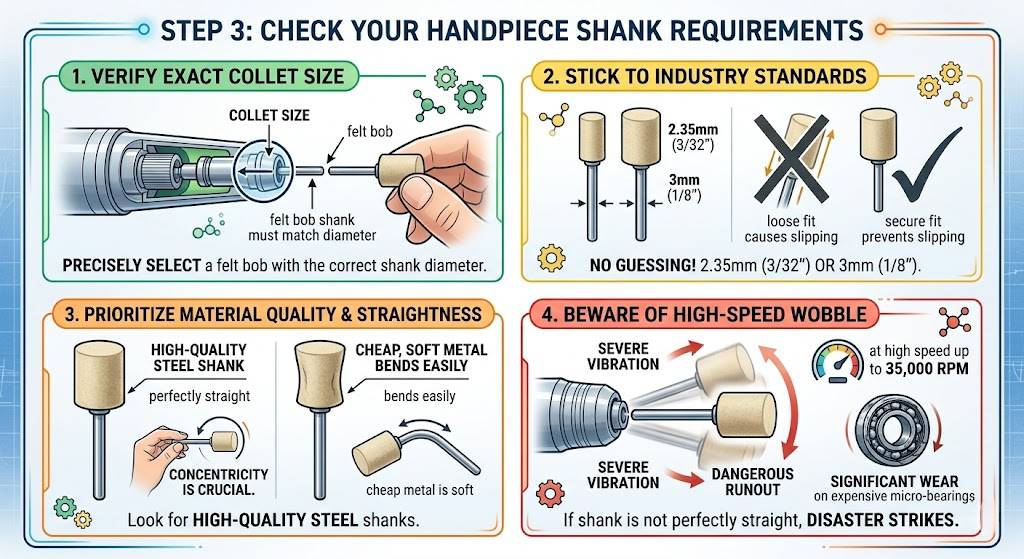
- Verify the Exact Collet Size: Always check the collet size of the micromotor handpiece you are currently using. You must precisely select a felt bob with the correct shank diameter.
- Stick to Industry Standards: The industry standards are exactly 2.35mm (3/32") or 3mm (1/8"). Do not guess. A loose fit causes immediate slipping.
- Prioritize Material Quality: Concentricity is absolutely crucial. Remind yourself to look for high-quality steel shanks when purchasing. Cheap, soft metal bends easily.
- Beware of High-Speed Wobble: If the shank is not perfectly straight, disaster strikes. It will cause severe vibration during high-speed operation. Think about a tool spinning at 35,000 RPM. This aggressive wobble creates dangerous runout.
- Protect Your Equipment: The vibration not only prevents effective polishing. It also causes significant wear and tear on the expensive micro-bearings within your handpiece. Quality shanks protect your equipment.
Step 4: Consider the Polishing Compound Pairing
Felt does not polish alone. It acts as the abrasive carrier. The dense wool fibers grab and hold your polishing agents securely.- Plan Your Purchase Quantity: Determine the quantity to purchase based on the specific polishing compound you have chosen. Think carefully about your diamond paste, ruby wax, or green rouge.
- The Golden Rule Tip: We strongly recommend purchasing several units at once. You must strictly adhere to the principle of “one polishing bob per specific grit level.”
- Prevent Cross-Contamination: This strict separation is the only way to prevent cross-contamination.
- Protect Your Final Polish: A single grain of coarse grit left on a finishing bob ruins everything. It will drag across your perfect mirror finish. You will have to start over entirely.
- Organize Your Workflow: Label your tools clearly.
Conclusion
Time to finalize your tool selection. Use this quick review checklist. Spend 10 seconds verifying these choices before making a purchase.- Hardness: Does it match my specific polishing stage?
- Shape: Will it physically fit into my workpiece details?
- Shank: Is it the exact size for my handpiece collet?
- Quantity: Do I have enough bobs to isolate my compounds?