

Industry News
How to Use Buffing Wheels for Dremel to Get a Mirror Finish
Ever tried polishing with a Dremel, only to end up with a dirty, scratched surface? Achieving a flawless mirror finish isn't just about spinning a wheel—it is a precise craft of sequencing, speed, and matching compounds. This step-by-step guide breaks down the exact process and "golden parameters" to safely turn your rough jewelry or metals into crystal-clear reflective masterpieces.
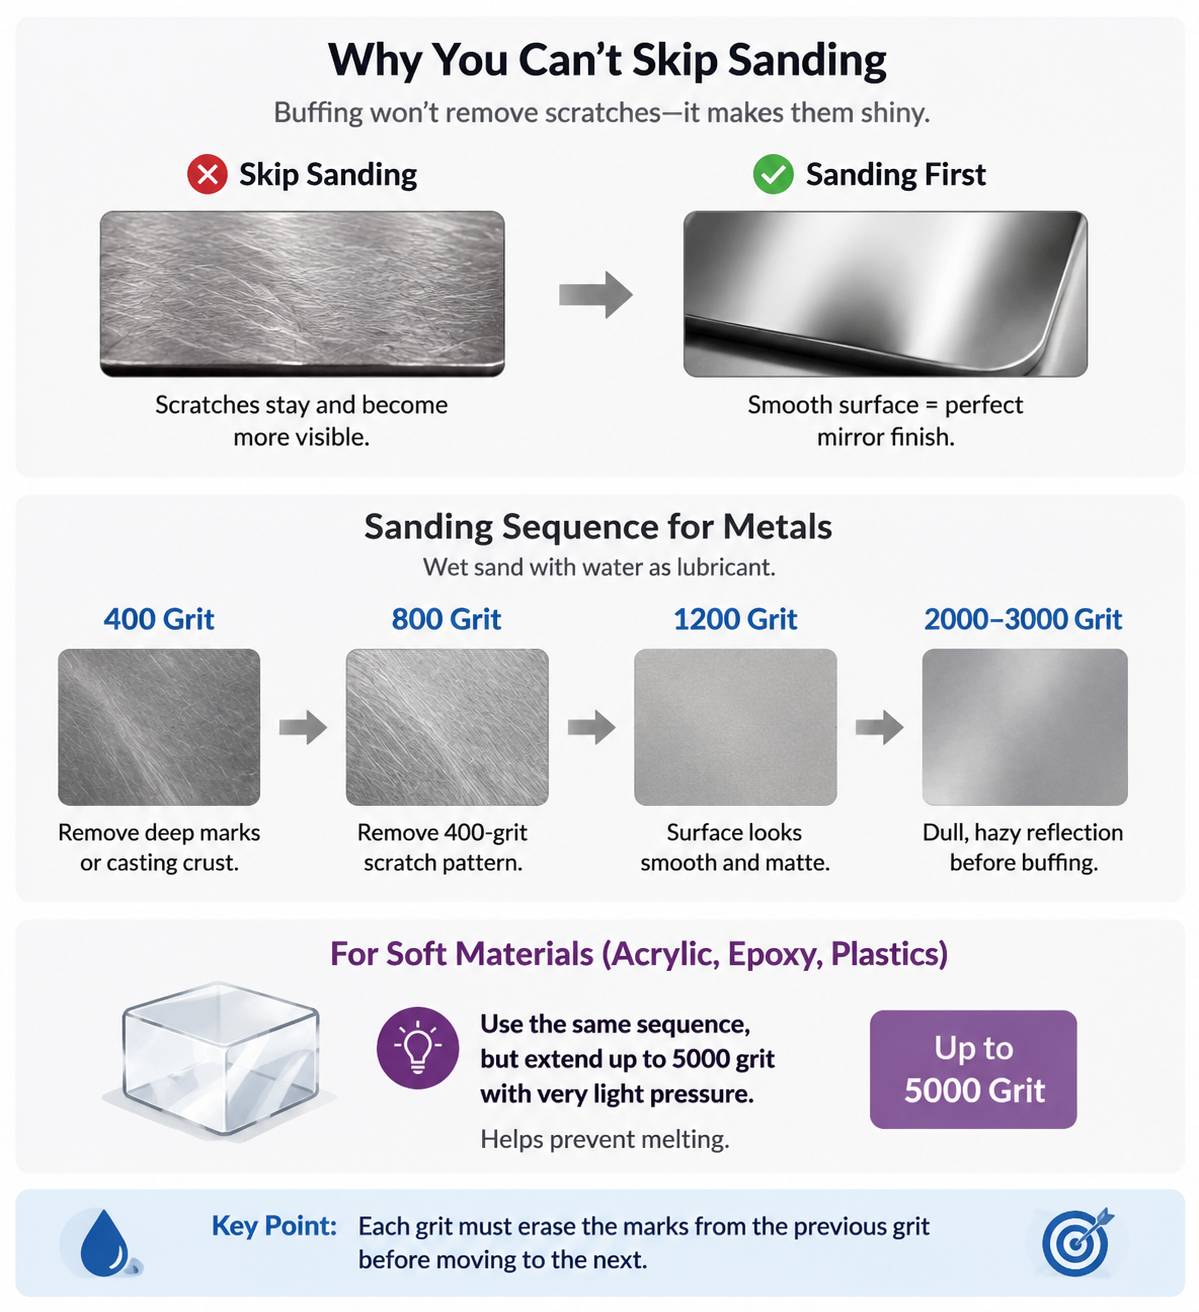
A Dremel buffing wheel is designed to blend and shine a surface, not to flatten it. If you apply a spinning cotton wheel directly to a scratched piece, it will only make those deep scratches incredibly shiny and reflective, highlighting every single defect instead of removing them.
To get a true mirror finish, you must use sandpaper to level the metal first. The rule of thumb is simple: Each sanding step must completely erase the sanding marks left by the previous, coarser grit.
Label the plastic shafts of your mandrels with a permanent marker (e.g., "GREEN," "RED," "WAX") to keep them organized.
For professional-grade results, explore the comprehensive catalog of polishing wheels and accessories at Orobrush.
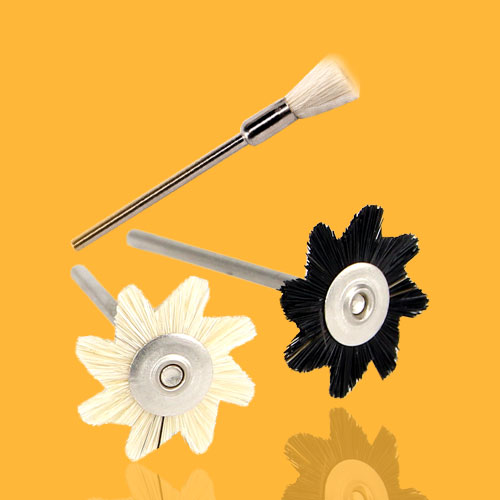
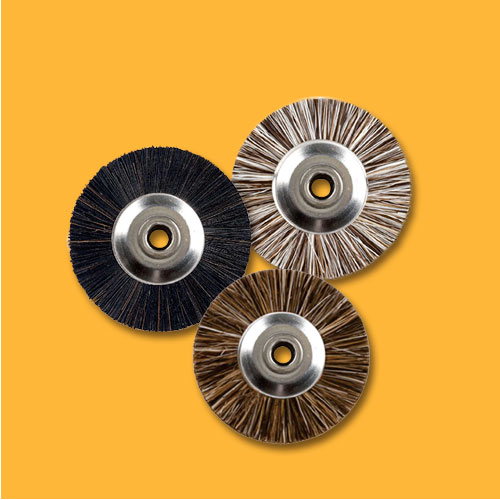
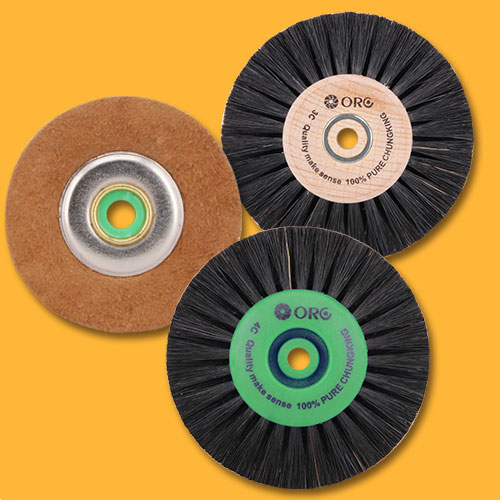
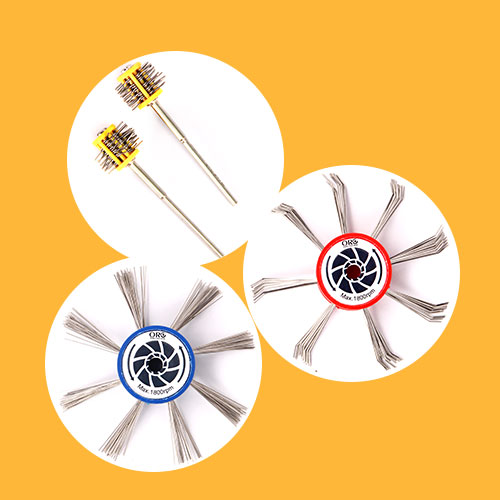
As a premier industry manufacturer and supplier, we specialize in high-durability cotton, felt, and radial bristle discs designed specifically for Dremel and other rotary tools. Whether you are running a high-volume jewelry workshop, a dental lab, or looking to expand your own brand's catalog, we have you covered:
I. Core Principles: The Biggest Misconception About Mirror Polishing
The most common mistake beginners make is mounting a cotton wheel, loading it with compound, and going straight to work on a raw, scratched surface.
Why You Can’t Skip Sanding (And Jump Straight to Buffing)
If your metal has visible scratches, dents, or tool marks,A Dremel buffing wheel is designed to blend and shine a surface, not to flatten it. If you apply a spinning cotton wheel directly to a scratched piece, it will only make those deep scratches incredibly shiny and reflective, highlighting every single defect instead of removing them.
To get a true mirror finish, you must use sandpaper to level the metal first. The rule of thumb is simple: Each sanding step must completely erase the sanding marks left by the previous, coarser grit.
The Exact Sandpaper Grits You Need (And the Right Order)
Before turning on your Dremel, you need to hand-sand your workpiece to a uniform, ultra-fine satin finish. Follow this sequence based on your material:For Metals (Gold, Silver, Brass, Stainless Steel)
Use wet-dry sandpaper and always wet sand (use water as a lubricant to keep the metal cool and wash away debris):- Start with 400 Grit: To remove deep tool marks or raw casting crust.
- Step up to 800 Grit: To remove the 400-grit scratch pattern.
- Step up to 1200 Grit: The surface will start to look smooth and matte.
- Finish with 2000 to 3000 Grit: By this stage, the metal should already have a dull, hazy reflection before you even touch a buffing wheel.
For Soft Materials (Acrylic, Epoxy Resin, Plastics)
Plastics melt easily under friction heat, so you must sand even higher before buffing:- Follow the same sequence as metal, but extend your wet sanding up to 5000 grit using extremely light pressure. This minimizes the time your Dremel needs to spend on the plastic, preventing the material from melting.
II. Checklist of Tools and Materials
To achieve a flawless, reflective surface, you need to match your carrier wheel to the appropriate compound. Using the wrong combination will lead to surface gouging or a dull, hazy finish.Choosing the Right Buffing Wheels for Dremel
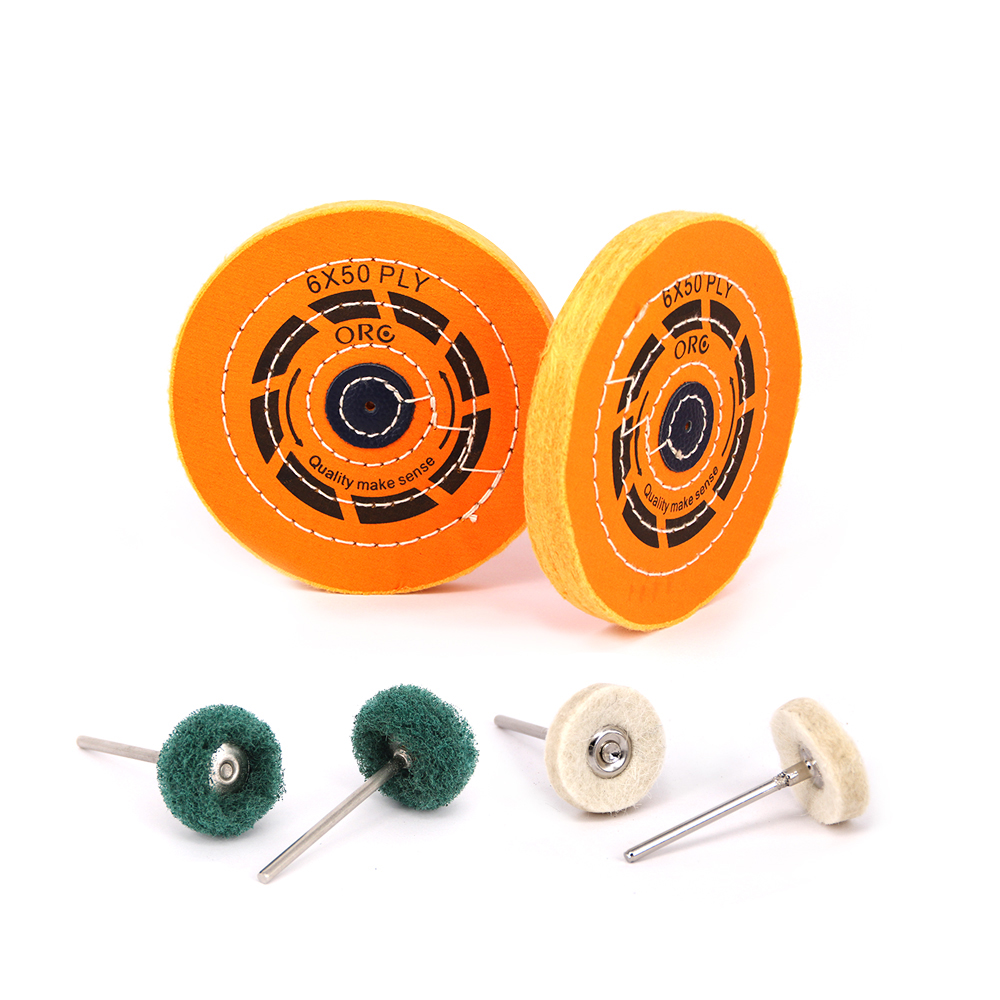
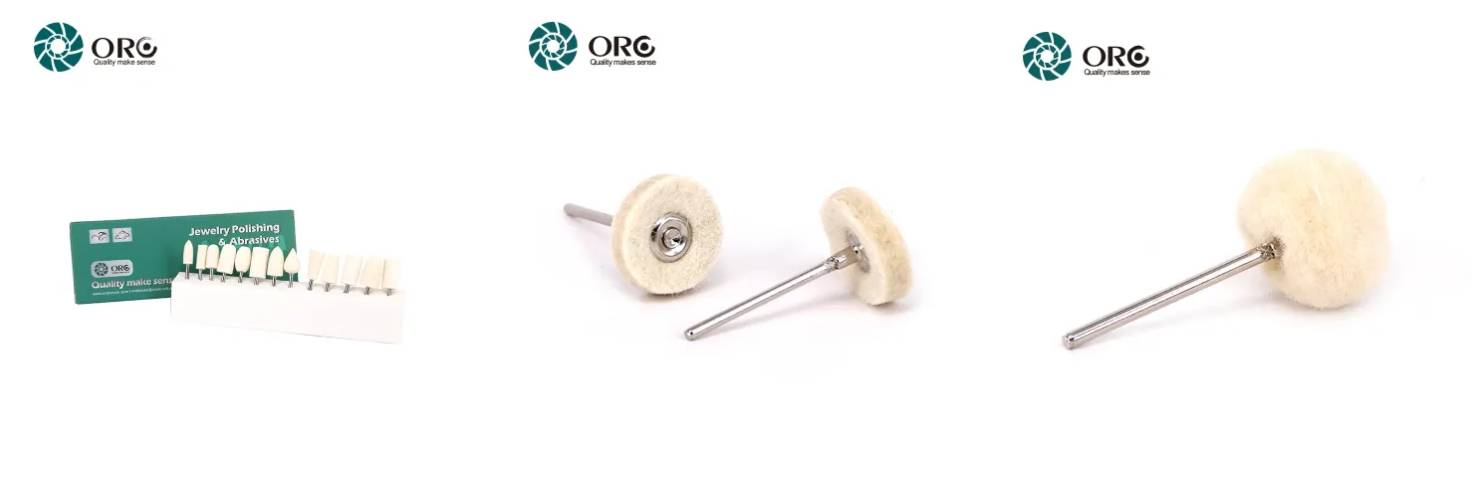
- Felt Bobs & Wheels (Hard): These dense, compressed wool felt accessories have a firm, rigid texture. They are ideal for the initial heavy-cutting stage, flattening stubborn sanding ridges, and polishing sharp edges without rounding them off.
- Cotton Wheels (Medium): Constructed from layered, stitched muslin cloth, these offer medium flexibility. They are perfect for broad, curved surfaces, helping to blend the finish and transition the piece into a high-luster state.
- Loose Buffing & String Wheels (Soft): Made of unstitched, loose cotton threads, these wheels flare out at speed. They exert almost no structural pressure, making them the gold standard for the final "Super Mirror" buffing step.
Polishing Compound Matrix
Polishing compounds contain fine abrasives suspended in a binder wax. As the wheel spins against the compound, the wax melts, transferring the abrasive particles to the fibers:| Compound Color | Common Name | Primary Function | Best Material Match |
| Black / Brown | Emery / Tripoli | Initial heavy cutting; fast scratch removal | Brass, copper, pewter, hard metals |
| Green | Chrome Oxide | Intermediate-to-final polishing; rich luster | Stainless steel, platinum, titanium, chrome |
| White | White Rouge | Medium cutting & finishing | Sterling silver, aluminum, hard plastics |
| Red | Jewelers Rouge | Ultra-fine final coloring; zero cutting action | Yellow gold, rose gold, fine silver |
III. Practical Steps: The 5-Step Dremel Mirror Polishing Method
Once your workspace is set up and your safety glasses are on, follow this refined five-step method to transform your raw, dull workpiece into a flawless mirror.
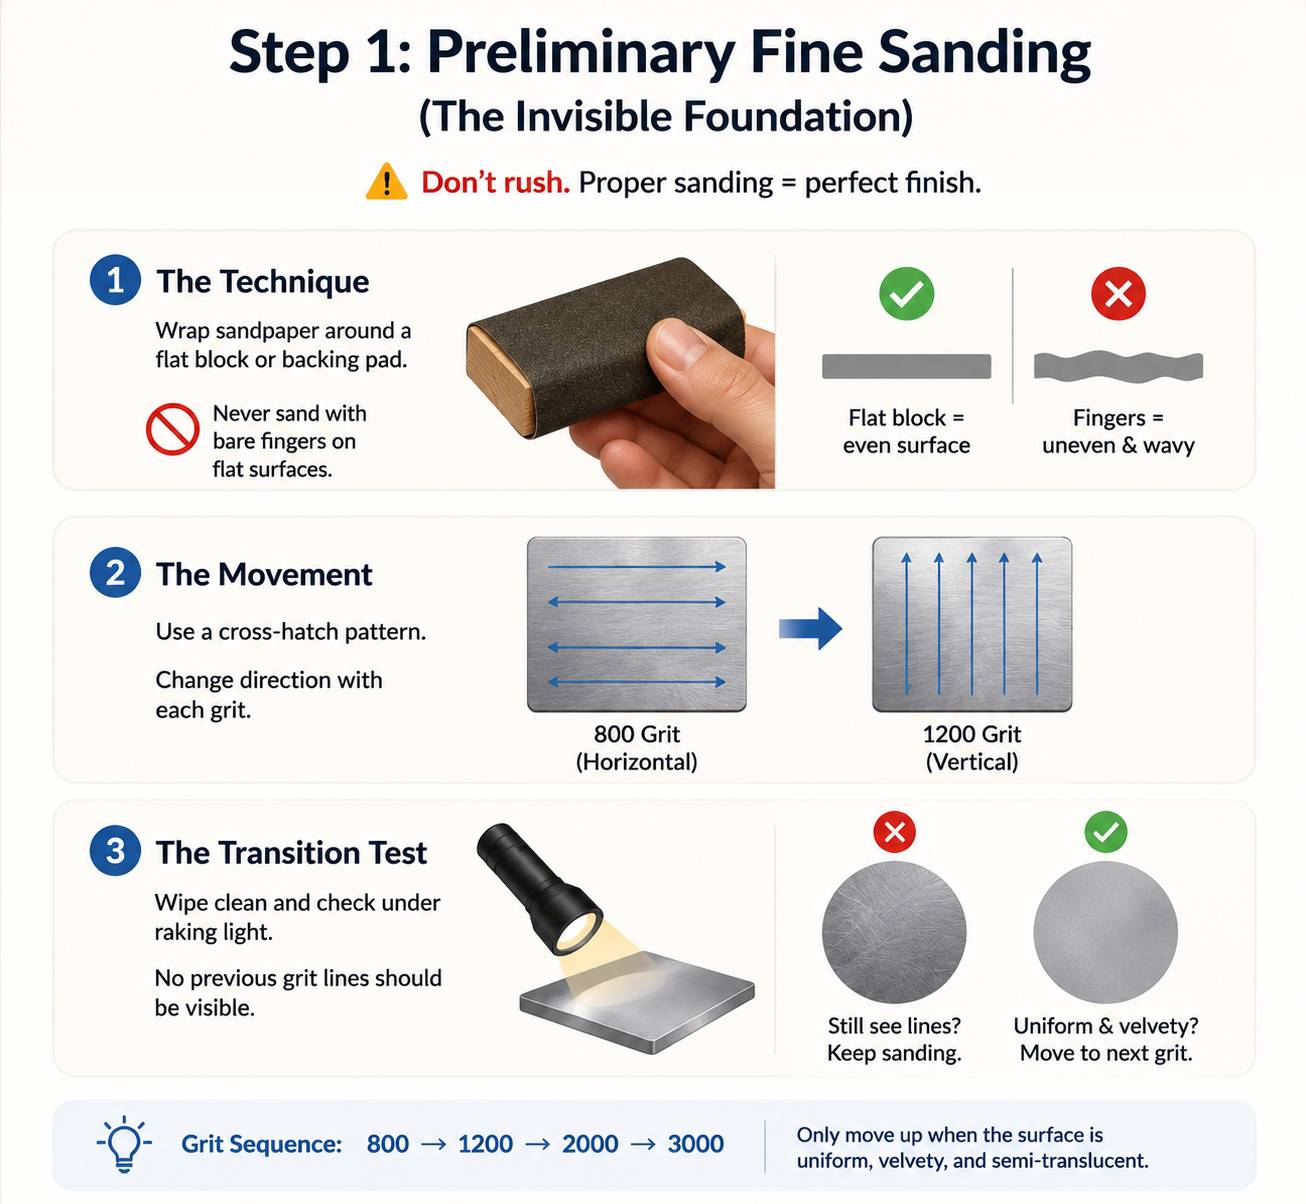
Step 1: Preliminary Fine Sanding (The Invisible Foundation)
Do not rush this step. If you do not sand properly, your polishing wheel will only make your mistakes shiny.- The Technique: Wrap your wet-dry sandpaper around a small, flat wooden block or a backing pad—never sand with bare fingers on flat surfaces, or you will create an uneven, wavy finish.
- The Movement: Use a cross-hatch pattern. If you sand horizontally with 800 grit, switch to vertical sanding when moving to 1200 grit.
- The Transition Test: Stop and wipe the workpiece dry. Inspect it under a raking light (a bright light held at a sharp angle). If you still see any horizontal 800-grit lines cutting through your vertical 1200-grit lines, keep sanding. Move to 2000 and finally 3000 grit only when the surface looks completely uniform, velvety, and semi-translucent.
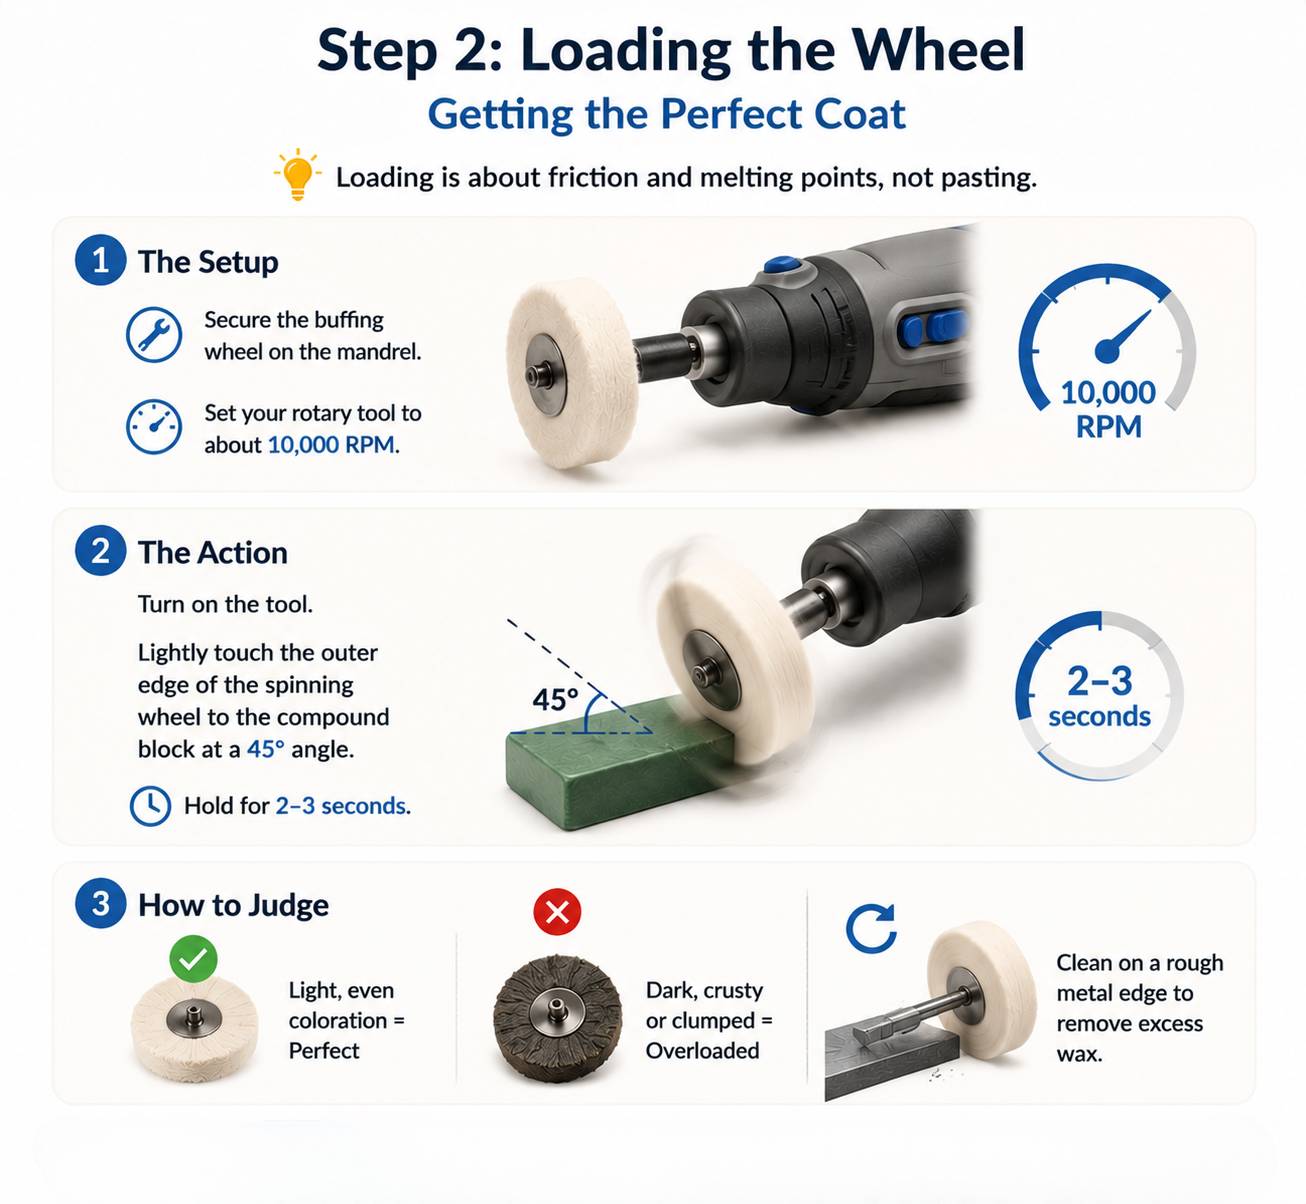
Step 2: Loading the Wheel (Getting the Perfect Coat)
Loading compound onto your wheel is about friction and melting points, not pasting it on like butter.- The Setup: Secure your Dremel buffing wheel onto the mandrel. Set your rotary tool to approximately 10,000 RPM.
- The Action: Turn on the tool, hold it firmly, and lightly bring the outer edge of the spinning wheel into contact with your compound block at a 45-degree angle. Hold it there for just 2 to 3 seconds.
- How to Judge: You want to see a light, even coloration transfer to the wheel. If the wool or cloth fibers look dark, crusty, or clumped together, you have overloaded it. If this happens, run the spinning wheel against a clean, rough metal edge (like a scrap piece of steel or a wheel rake) to strip off the excess wax.
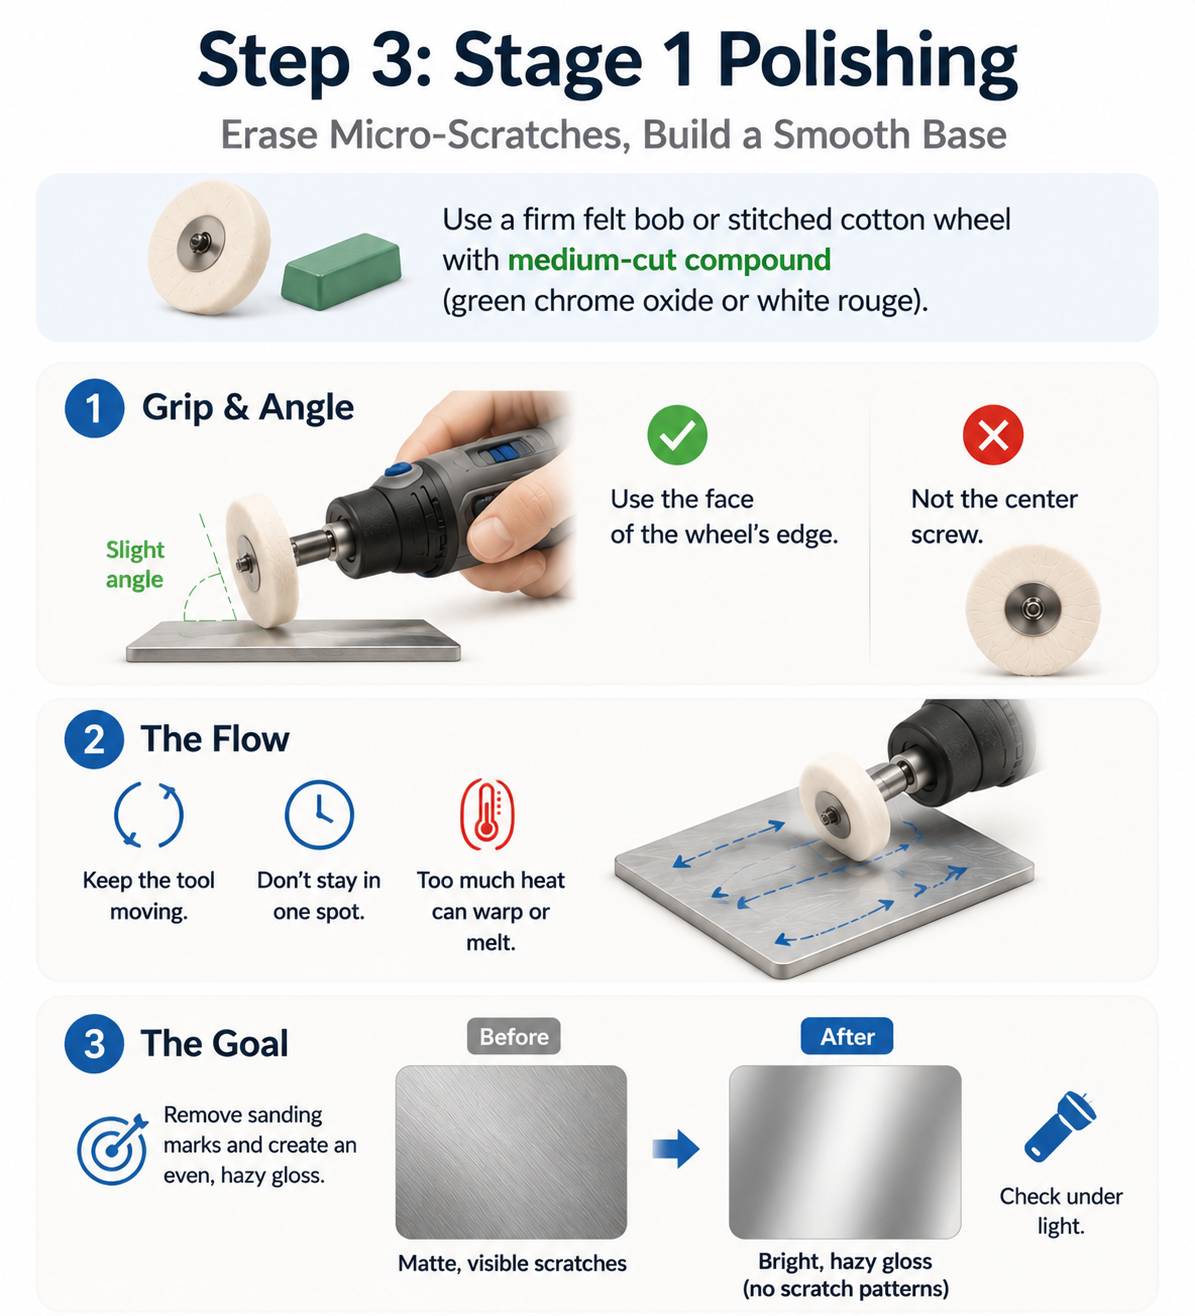
Step 3: Stage 1 Polishing (Erasing the Sanding Micro-Scratches)
This is where we transition from sanding to actual buffing, using a firm felt bob or a tightly stitched cotton wheel paired with your medium-cut compound (like green chrome oxide or white rouge).- The Grip & Angle: Hold the Dremel like a heavy pen. Keep the spinning wheel at a slight angle relative to the surface so you are buffing with the face of the wheel's edge, not the metal screw in the center of the mandrel.
- The Flow: Keep the tool moving in smooth, constant, sweeping passes. Never let the spinning wheel sit in one spot for more than a second. The heat generated at 10,000 RPM can easily warp silver or warp/melt resins.
- The Goal: Work across the grain of your last sanding step. Stop when the entire surface has transitioned from a matte satin to a bright, hazy gloss with zero visible scratch patterns under a light.
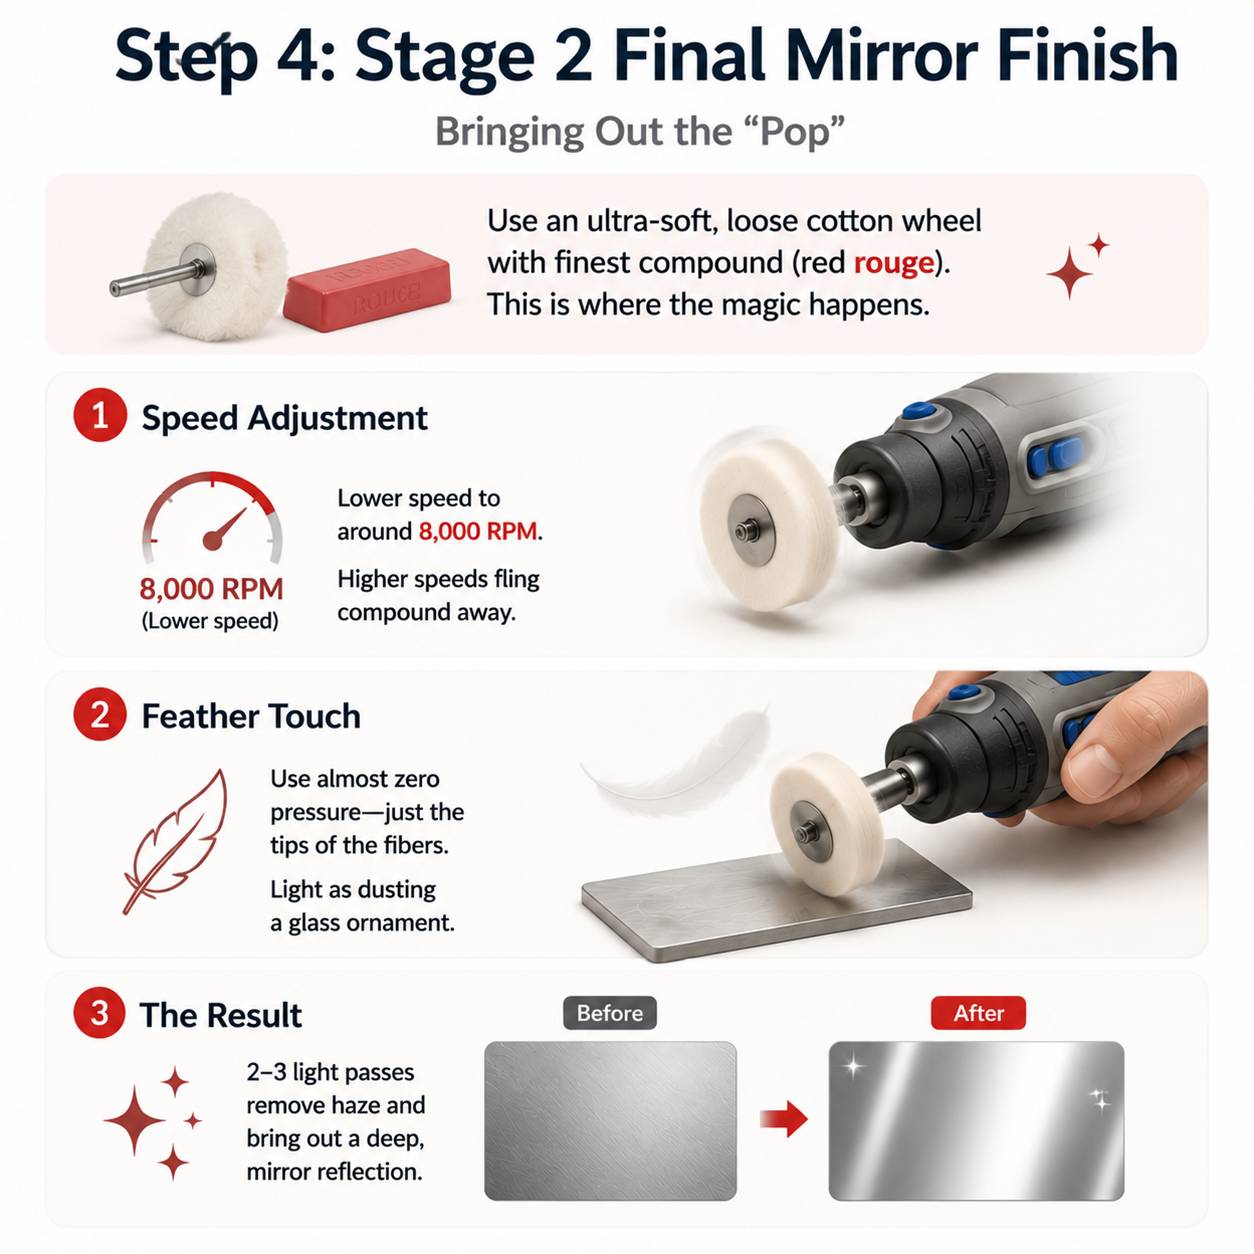
Step 4: Stage 2 Final Mirror Finish (Bringing Out the "Pop")
Now, we switch to our ultra-soft, loose cotton buffing wheel and our finest polishing compound (like red rouge). This is where the magic happens.- The Speed Adjustment: Drop your Dremel speed down slightly to around 8,000 RPM. Higher speeds aren't needed here and will only fling this ultra-fine compound away.
- The Feather Touch: This step requires almost zero physical downward pressure. Imagine you are lightly dusting a delicate glass ornament. You want only the very tips of the spinning cotton fibers to sweep over the metal.
- The Result: As you make 2 or 3 extremely light, sweeping passes, the compound will cut the remaining microscopic haze. You will see the metal surface instantly clear up, revealing a deep, deep mirror reflection where light bounces off cleanly without scattering.
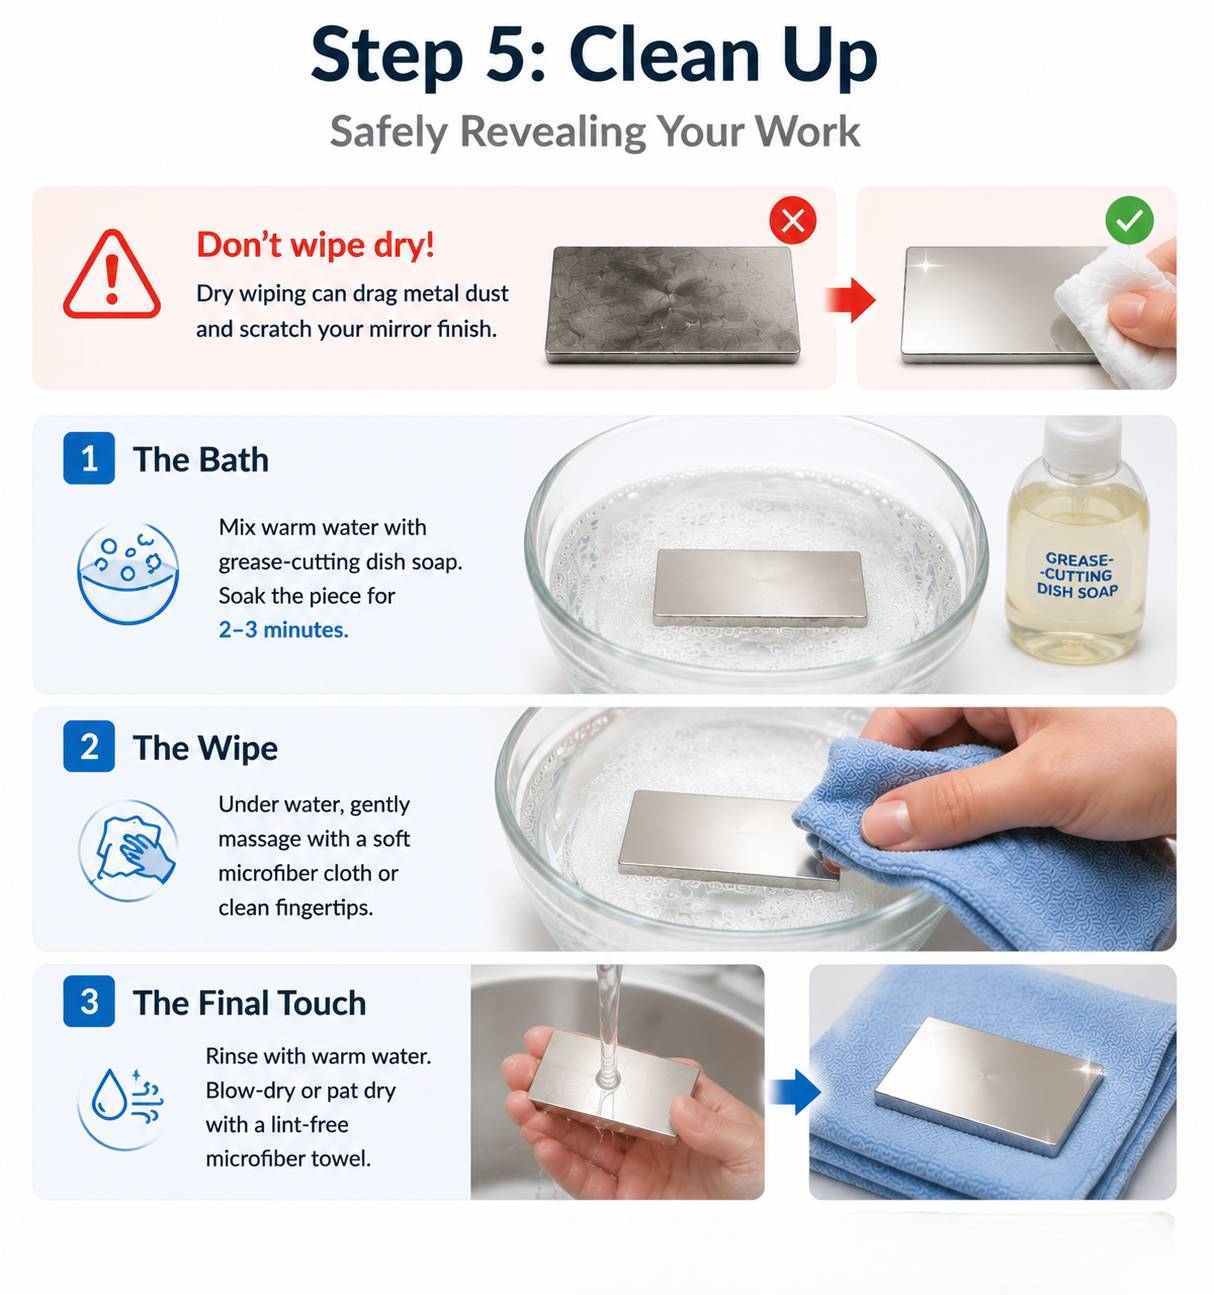
Step 5: Clean Up (Safely Revealing Your Work)
When you turn off your Dremel, your mirror finish will be hidden under a greasy, dark gray film of melted wax and micro-metal dust. Do not wipe this off dry. Wiping dry wax with a paper towel or even a standard cloth will drag the sharp metal dust across your brand-new mirror, scratching it immediately.- The Bath: Mix warm water with a heavy squirt of grease-cutting dish soap (like Dawn) in a small bowl. Submerge your workpiece and let it sit for 2 to 3 minutes to loosen the binder wax.
- The Wipe: Using a fresh, ultra-soft microfiber cloth or your clean fingertips, gently massage the soapy mixture over the piece under water.
- The Final Touch: Rinse with clean, warm water and blow-dry the piece, or gently pat it dry with a lint-free microfiber towel. Your crystal-clear mirror finish is now fully revealed.
IV. Pro-Level Tips to Avoid Common Pitfalls
Even experienced jewelers can occasionally run into trouble. Keep these professional guidelines in mind to guarantee consistent results:The "One Wheel, One Compound" Rule
Never mix different polishing compounds on the same wheel. If you apply red jewelers rouge onto a felt bob that still has remnants of aggressive black emery compound, those coarse black particles will contaminate the wheel, leaving visible scratches on your finish.Label the plastic shafts of your mandrels with a permanent marker (e.g., "GREEN," "RED," "WAX") to keep them organized.
Temperature and Speed Control
Higher speeds do not equal faster results. If you run your Dremel at its maximum speed (often 30,000+ RPM), the compound wax will instantly melt and fly off the wheel, leaving dry fibers to burn the surface.- Metals: Maintain a steady 8,000 to 12,000 RPM.
- Plastics, Resin, and Acrylic: Keep the speed strictly under 5,000 RPM. High speeds will melt the polymer, dragging gouges into your workpiece that are incredibly difficult to sand out.
Don't Use Brute Force
Pressing down hard on your rotary tool compresses the flexible buffing wheel flat against the surface. When the wheel compresses completely, the exposed metal screw of your Dremel mandrel can strike your workpiece, causing instant, deep gouges. If you find the tool isn't cutting, reload a small amount of compound rather than pressing harder.Achieve Perfect Luster Every Time
Bringing a raw jewelry casting or precision metal piece to a flawless, mirror-like finish is a highly rewarding process that depends entirely on using high-quality consumables. Lower-grade buffing wheels shed fibers instantly or feature off-center mandrels that vibrate wildly at high speeds, making precision control impossible and ruining your hard-earned finish.For professional-grade results, explore the comprehensive catalog of polishing wheels and accessories at Orobrush.
As a premier industry manufacturer and supplier, we specialize in high-durability cotton, felt, and radial bristle discs designed specifically for Dremel and other rotary tools. Whether you are running a high-volume jewelry workshop, a dental lab, or looking to expand your own brand's catalog, we have you covered:
- Bulk & B2B Wholesale: Enjoy highly competitive factory-direct pricing on bulk orders with stable global supply chains and logistics.
- OEM & Private Labeling: We provide full private label services, helping you customize packaging, specs, and branding to establish your own premium tool line.
- Precision-Engineered Quality: Our buffing wheels are balanced and vibration-free to ensure perfect control even at high RPMs.