By Orobrush | 27 March 2026 | 0 Comments
Choose the Right Sandpaper Grit for Metal Polishing
Choosing the wrong sandpaper grit leaves deep scratches and ruins expensive metal. But selecting the right grit makes metal polishing a precise science. This guide reveals the complete logical progression you need. We will take your project from rough grinding to a flawless mirror finish.
One-Sentence Summary: For general daily sanding, choose Aluminum Oxide; for fine polishing and hard metals, choose Silicon Carbide wet/dry sandpaper.
Ready to achieve that perfect finish? Visit the Orobrush official website to purchase high-quality sandpaper tools built for your exact project needs.
I. Sandpaper Grit Classification and Applications
Numbers dictate your finish. Lower numbers mean a rough, aggressive cut. Higher numbers yield a smooth, fine polish. Never guess your grit. Here is your essential metal polishing grit chart.| Grit Range | Stage | Primary Function |
| 40–180 | Coarse Grinding | Strips heavy rust. Removes deep gouges. Levels uneven welds. |
| 220–400 | Medium Grinding | Smooths out harsh scratches left by coarse grits. |
| 600–1000 | Fine Grinding | Preps the surface for polishing. Removes visible textures. |
| 1200–3000+ | Polishing | Achieves a semi-matte to a flawless, reflective mirror finish. |
II. A Concise Guide to Choosing Sandpaper Materials
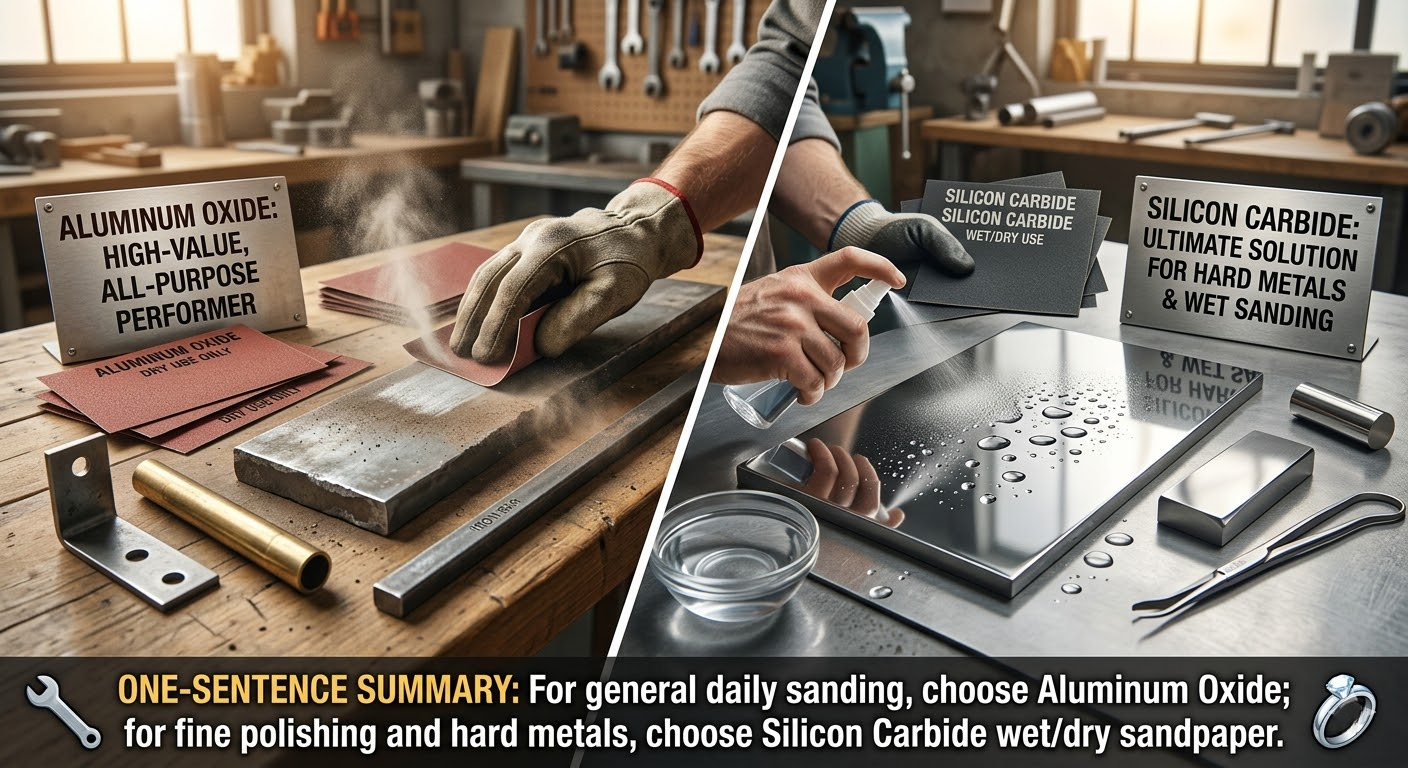
Aluminum Oxide: "The High-Value, All-Purpose Performer"
This is your daily workhorse. It is perfect for dry sanding. Use it on standard metals like iron, brass, and mild steel. The grains are tough. It offers fantastic value for everyday workshop tasks.Silicon Carbide: "The Ultimate Solution for Hard Metals and Wet Sanding"
This abrasive is a different beast. It features extremely hard, razor-sharp abrasive grains. The grains break down during use. This reveals fresh, sharp edges constantly. It cuts fast. It is ideal for high-hardness metals. Think stainless steel or titanium alloys. Above all, it is the absolute preferred material for wet sanding.One-Sentence Summary: For general daily sanding, choose Aluminum Oxide; for fine polishing and hard metals, choose Silicon Carbide wet/dry sandpaper.
III. Three Core Principles for Selecting Grit
Follow these professional rules to avoid disaster.
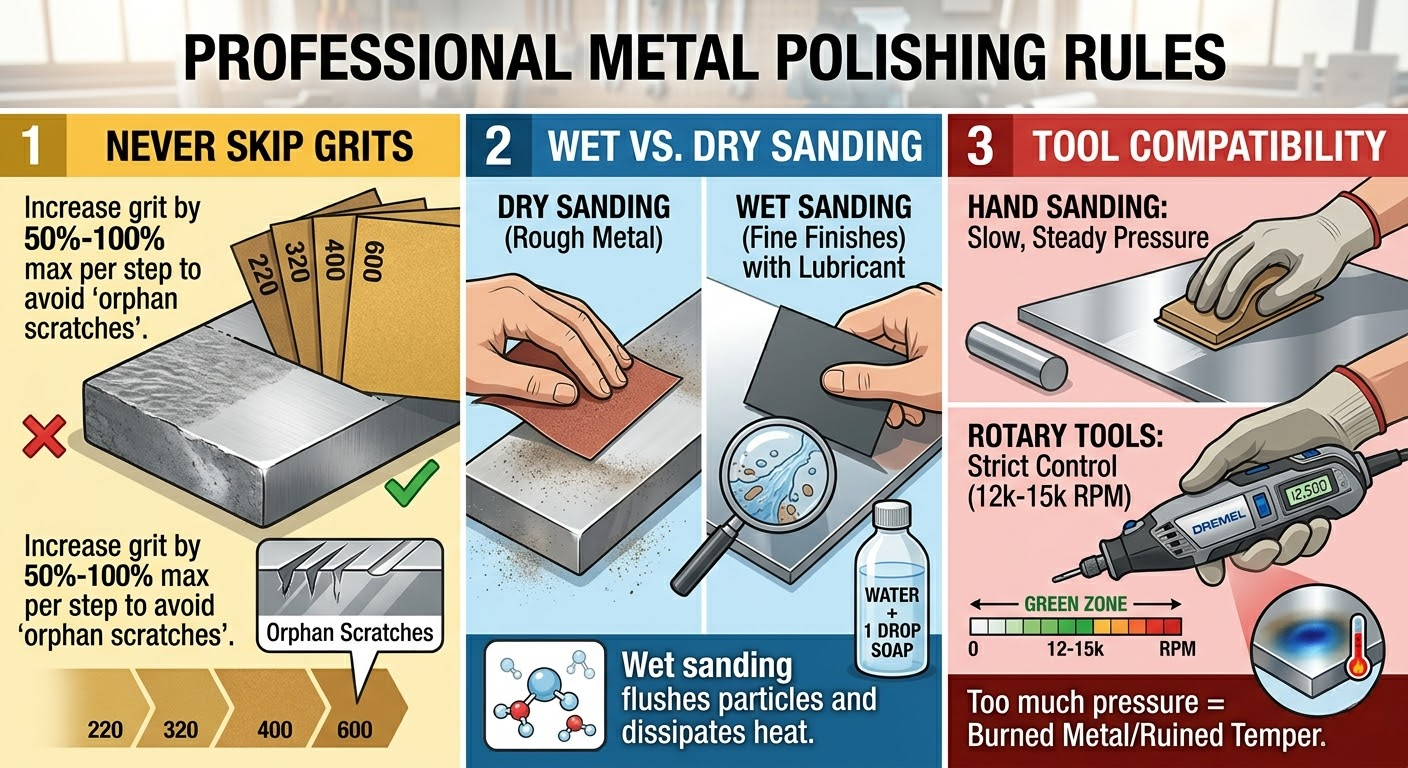
1. Never Skip Grits
Don't jump from 220 directly to 1000 grit. It will fail. You must gradually step up. Skipping grits leaves "orphan scratches." These are deep valleys hiding under a polished surface. A safe rule is increasing your grit by no more than 50% to 100% per step.2. Wet vs. Dry Sanding
Dry sanding works for rough metal. But fine finishes demand liquid. Wet sanding flushes away loose metal particles. It prevents the abrasive from clogging. It also dissipates dangerous heat buildup. Pro Tip: Add one drop of dish soap to your water. It breaks surface tension. This makes the Silicon Carbide paper glide beautifully.3. Tool Compatibility
Hand sanding requires slow, steady pressure. Rotary tools are completely different. Using a micro-sander or Dremel requires strict control. Keep your speed between 12,000 and 15,000 RPM. Let the abrasive do the cutting. Pressing hard will burn the metal. It ruins the temper.IV. Core Operational Workflow
A flawless finish requires strict discipline. Follow these four crucial steps.
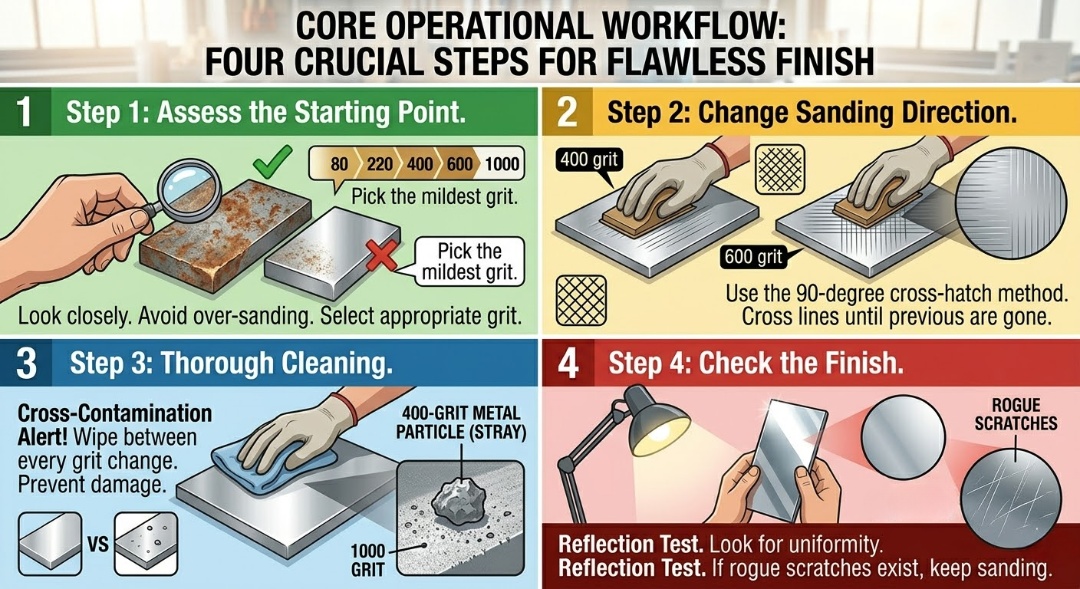
- Step 1: Assess the Starting Point. Look closely at the metal. Avoid over-sanding. Don't start with 80 grit for light oxidation. Pick the mildest grit that effectively gets the job done.
- Step 2: Change Sanding Direction. Use the 90-degree cross-hatch method. Sand horizontally with your first grit. Then, sand vertically with the next. This creates a clear visual grid. When horizontal lines vanish, move on.
- Step 3: Thorough Cleaning. Clean the metal between every grit change. Wipe it down with a microfiber cloth. Prevent cross-contamination. One stray piece of 400-grit metal shaving will instantly ruin a 1000-grit polish.
- Step 4: Check the Finish. Perform a light reflection test. Hold the metal to a bright lamp. Look closely at the scratch pattern. The surface should look uniform. If you see rogue scratches, keep sanding.
V. Common Pitfalls to Avoid
Many beginners ruin their work here. Watch out for these traps.
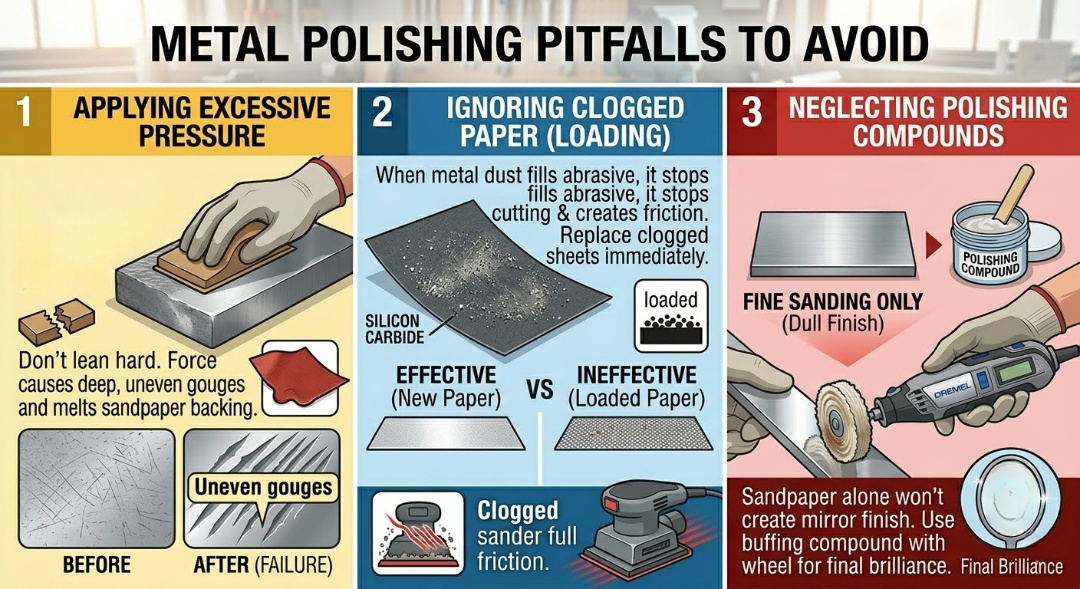
- Applying excessive pressure: Don't lean hard into the metal. Excessive force causes deep, uneven gouges. It also melts the sandpaper backing.
- Ignoring clogged paper: This is called "loading." When metal dust fills the abrasive, it stops cutting. It just creates friction. Replace clogged sheets immediately.
- Neglecting polishing compounds: Sandpaper alone won't create a true mirror finish. You must use a buffing compound. Pairing the right compound with a cotton or felt polishing wheel unlocks that final brilliance.
VI. "Golden Recommendations" for Different Scenarios
Every project is unique. Here are proven workflows for common professional jobs.- Rust Removal & Refurbishment: Start rough. Work your way up patiently. Sequence: Start with 80/120 grit -> 240 -> 400. This leaves a clean, matte finish.
- Hand Polishing for Jewelry & Small Metal Parts: Precision is critical. Scratches ruin jewelry. Sequence: 600 grit -> 1200 -> 2500 -> Finish with polishing compound. This yields a stunning mirror finish.
- Automotive Metal Parts: Car parts demand durability and high shine. Sequence: 320 grit -> 600 -> 1000 -> 2000. Follow up with a protective metal wax.
Summary
Metal polishing is an exact art. It takes time. Patience is your best tool. Never rush the grit progression. Clean your workpiece constantly. Let the sandpaper do the hard work. The brilliant results will be worth your effort.Ready to achieve that perfect finish? Visit the Orobrush official website to purchase high-quality sandpaper tools built for your exact project needs.
Leave a Reply
Your email address will not be published.Required fields are marked. *