By Orobrush | 13 March 2026 | 0 Comments
Silicone vs. Rubber Dental Polishers: What's the Difference?
In dental restorations, surface gloss is a clinical necessity, not just an aesthetic choice. Yet, many professionals grab a polisher out of habit, risking overheating or a failed finish. This article breaks down the six core differences between rubber and silicone to help you master your workflow.
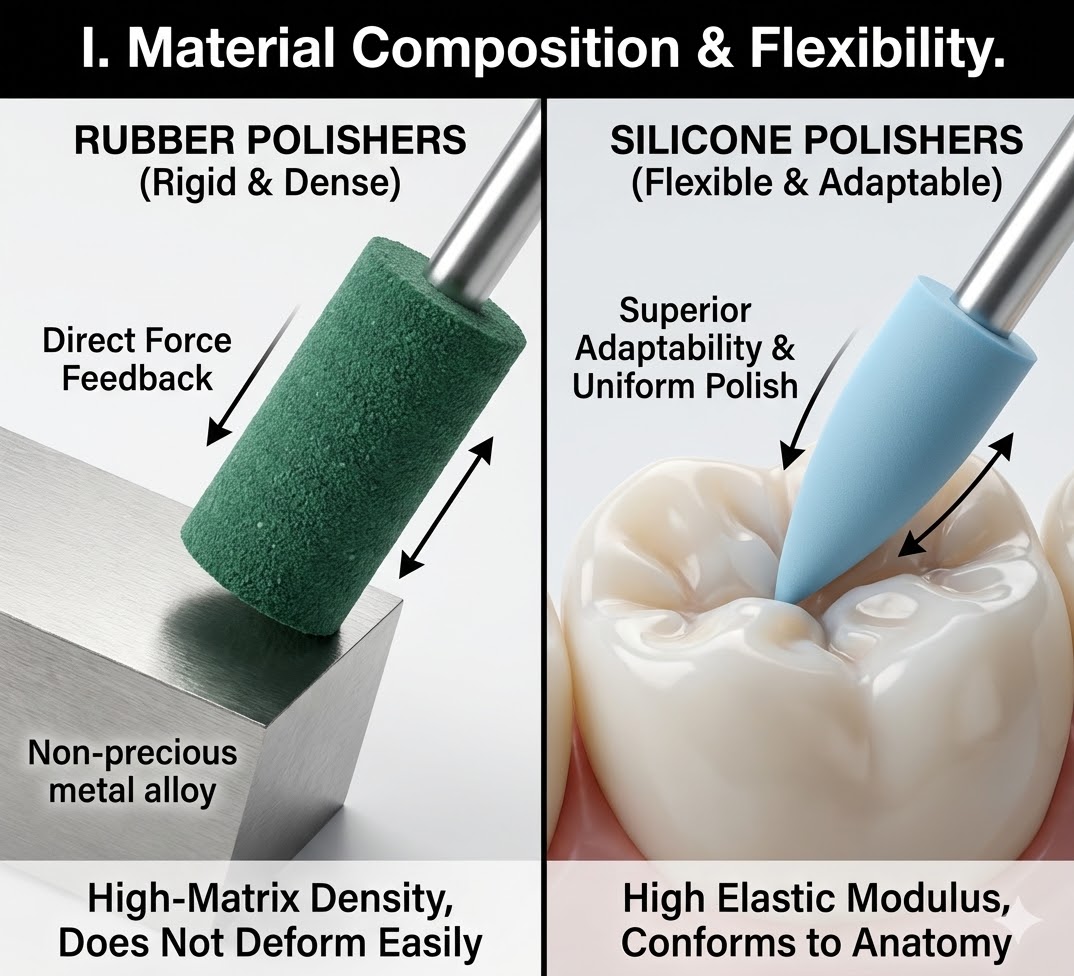
I. Material Composition & Flexibility
The divide between rubber and silicone isn't superficial; it's a difference born at the molecular level, defining exactly how the polisher feels in your hand.
- Rubber Polishers: Think of these as your rigid workhorses. They feature a high-matrix density, giving them a decidedly stiff texture. When you apply pressure, a rubber tip won’t deform. For you, this means direct, tactile "force feedback." It’s exactly what you need when you're aggressively reducing harder substrates, like those non-precious metal alloys or high-density polymers.
- Silicone Polishers: Silicone is a different beast entirely, possessing a much higher elastic modulus. This gives it superior "adaptability." If you've ever struggled to polish deep into the delicate pits and fissures of an occlusal surface, you need silicone. As you apply the point, it subtly conforms to that complex anatomy, ensuring a uniform polish across irregular surfaces without ever flattening the essential anatomy you worked so hard to sculpt.
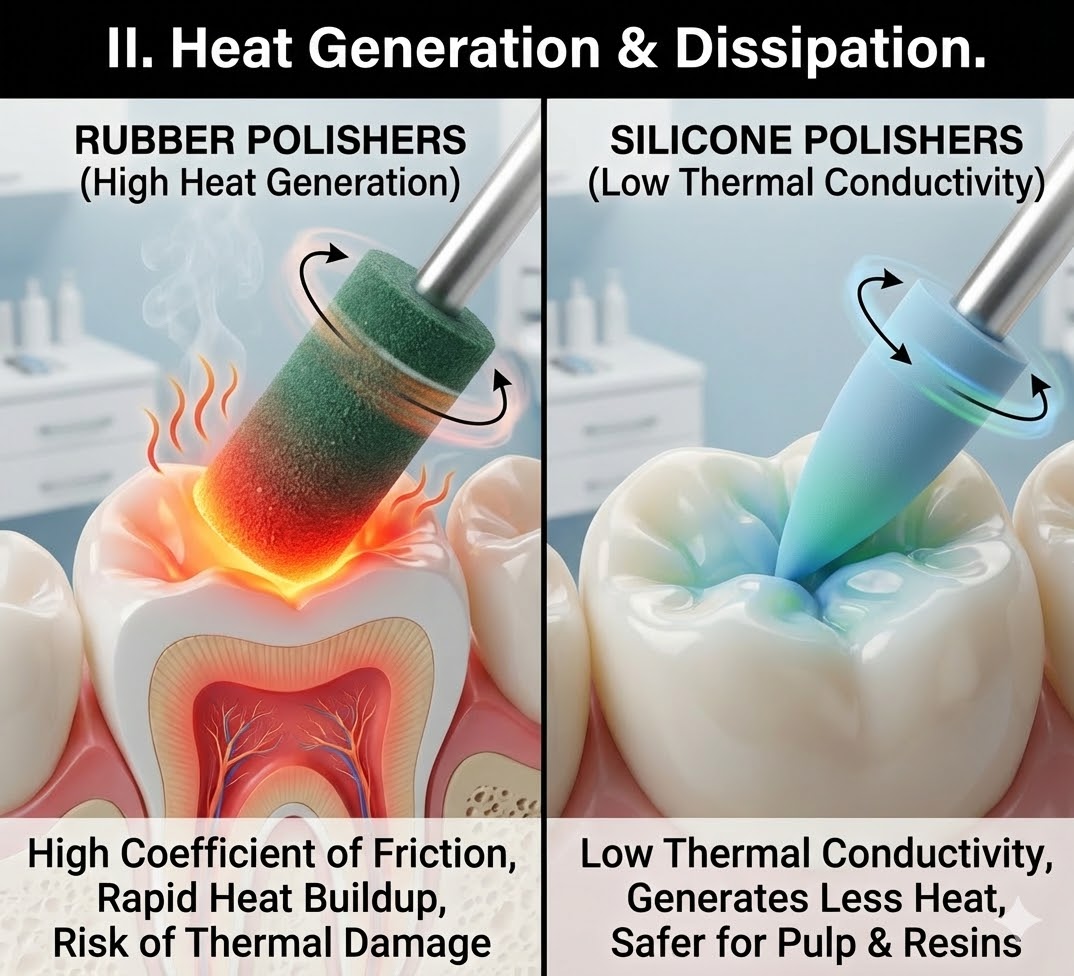
II. Heat Generation & Dissipation
In dentistry, heat is your silent enemy. Work too long on a heat-sensitive resin or near vital pulp, and you’re looking at material degradation or, worse, thermal damage for the patient.
- Rubber’s Risk: Here’s the critical drawback of rubber: it has a exceptionally high coefficient of friction. Run it at high speeds, and it builds up heat extremely quickly. If you aren’t religious about your water cooling, or if you don't use a strict intermittent, "feather-touch" technique, you risk smearing and thermal degradation of the composite resin surface.
- Silicone’s Safety: In contrast, silicone is your safer bet for intraoral work. It’s chemically more stable and, crucially, has low thermal conductivity. Even when you run them at higher recommended RPMs, silicone tips generate significantly less heat than rubber. When the priority is patient comfort and maintaining the structural integrity of your materials, silicone is the only professional choice.
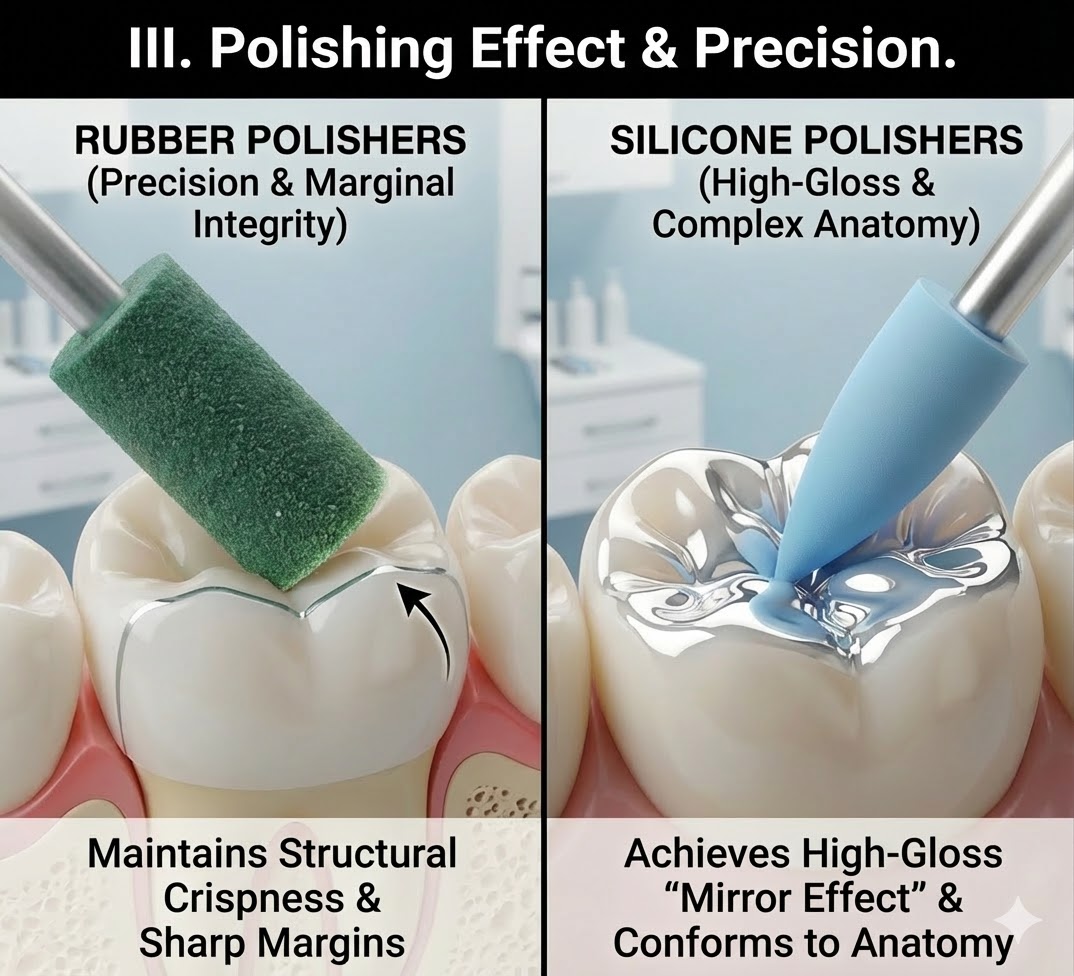
III. Polishing Effect & Precision
Choosing between these two is often a strategic trade-off. Do you need "the glow," or do you need to maintain "the edge"?
- Silicone for the Glow: Because the abrasive particles are more uniformly distributed within its flexible matrix, silicone is simply better at achieving a finer surface texture. If your goal is that high-luster, "mirror effect"—the gold standard of esthetic dentistry—silicone is your closer.
- Rubber for the Edge: But what about precision? This is where rubber shines. Its inherent hardness keeps it from "slopping" over onto adjacent structures. When you need to refine a specific edge gap or ensure you maintain sharp margins (marginal integrity) without the polisher rounding them off, you want the rigidity of rubber.
- Pro Tip from the Workbench: Use silicone for your final, high-esthetic polish, and use rubber during your initial shaping stages when margin preservation is paramount.
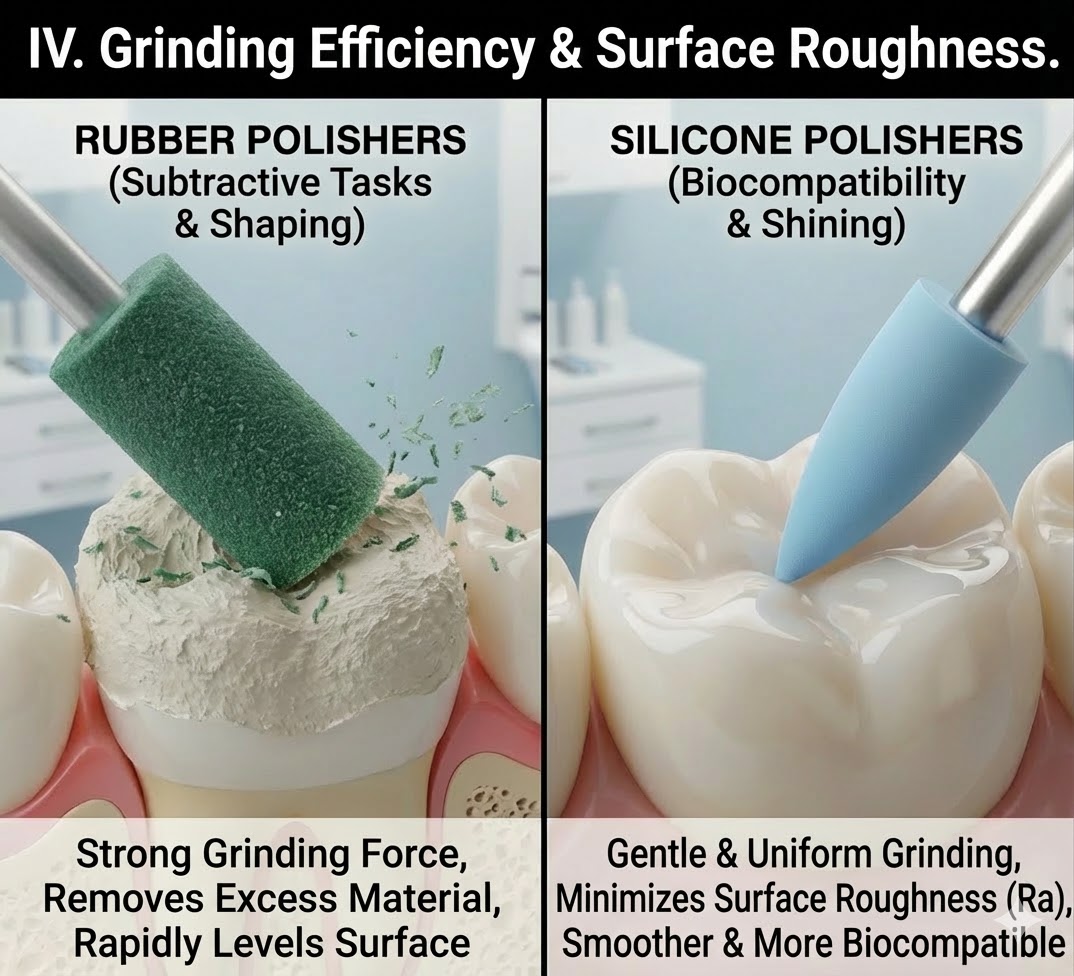
IV. Grinding Efficiency & Surface Roughness
A successful restoration is always a progression from "shaping" to "shining." Understanding which tool handles which phase is key.
- Rubber for the "Subtractive" Stage: When you’re in the initial finishing phase—rapidly removing excess material, leveling a surface, or smoothing out burr marks—reach for rubber. Its strong grinding force is perfectly designed for these heavy-lifting, subtractive tasks.
- Silicone for "Biocompatibility": Silicone takes over when the job becomes more refined. It offers a gentle, uniform grinding force that focuses on minimizing the surface roughness (or Ra value). A lower Ra value isn't just a number; it means a smoother surface that is more biocompatible, feels more natural to the patient’s tongue, and actively discourages food residue buildup.
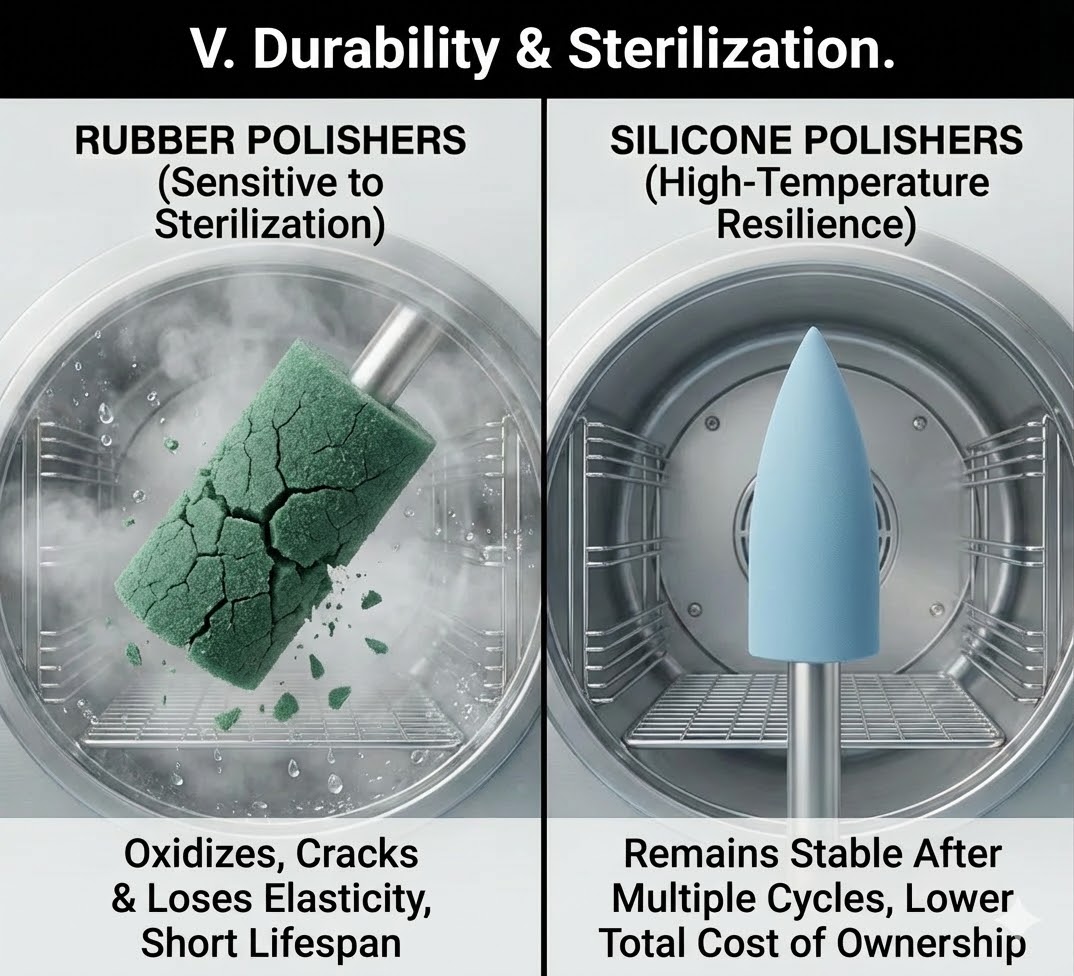
V. Durability & Sterilization
If you’re running a busy practice or a productive lab, you aren’t just looking at performance—you’re looking at the cost per use.
- The Problem with Rubber: Frankly, rubber polishers hate the autoclave. The harsh environment of high-temperature steam and chemical disinfectants is brutal on them. Repeated sterilization cycles will inevitably cause rubber to oxidize, become brittle, and lose its elasticity. A brittle polisher is a useless polisher, giving them a frustratingly short lifespan.
- The Silicone Advantage: Silicone, however, is a champion of high-temperature resilience. We engineered our professional silicone line to have physical properties that remain remarkably stable, cycle after cycle. While the initial investment for a high-quality silicone tip might be higher, its long-term resilience almost always results in a lower total cost of ownership.
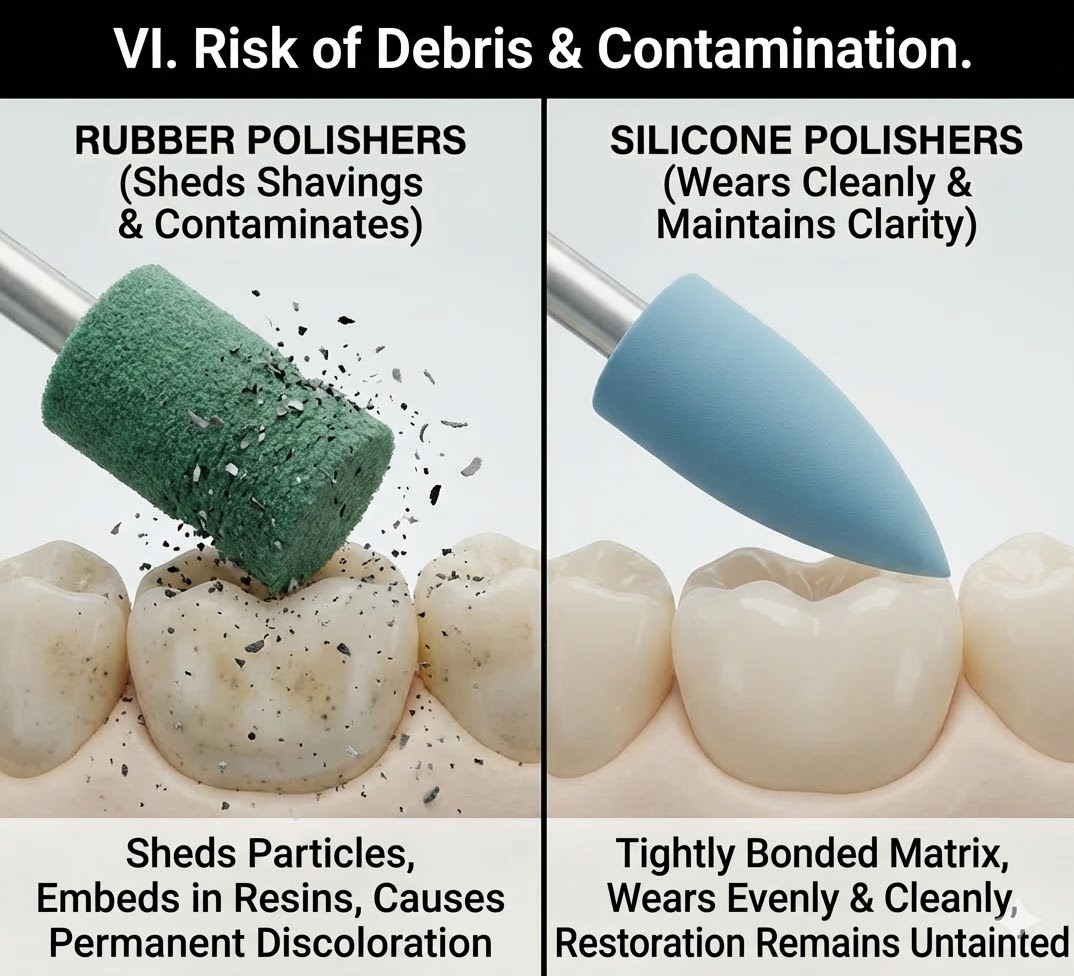
VI. Risk of Debris & Contamination
Here’s a detail that gets overlooked right up until the point it ruins a perfect restoration: the "cleanliness" of the polisher itself.
- Rubber's Hidden Cost: Lower-quality rubber polishers have a tendency to degrade chaotically. As they wear down, they can shed tiny grey or black shavings. In the worst-case scenario, these microscopic particles become embedded in the micropores of a light-colored resin or ceramic, leading to permanent, devastating discoloration.
- Silicone's Clarity: Our silicone polishers are designed to avoid this nightmare. The particles are tightly bonded within the matrix. The material wears down evenly and cleanly. This not only gives you a clean working field but ensures your final restoration remains completely untainted by tool debris, maintaining its visual clarity.
Quick Reference Guide: Rubber vs. Silicone Polishers
| Feature | Rubber Polishers | Silicone Polishers |
| Flexibility & Feel | Rigid, provides direct force feedback | Highly elastic, conforms to complex anatomy |
| Heat Generation | High (risk of thermal damage) | Low (safer for intraoral use and vital pulp) |
| Polishing Effect | High precision, maintains sharp margins | High-luster finish, achieves "mirror effect" |
| Grinding Action | Aggressive shaping (subtractive phase) | Gentle, minimizes surface roughness (Ra value) |
| Autoclave Durability | Low (oxidizes, becomes brittle quickly) | High (remains stable after multiple cycles) |
| Contamination Risk | High (can shed shavings and discolor resin) | Low (wears evenly, maintains a clean field) |
| Optimal Workflow | Stage 1: Initial shaping & heavy lifting | Stage 2: Final shining & aesthetic gloss |
Conclusion: A Complementary Partnership
My final advice? Stop seeing rubber and silicone as rivals. In a truly efficient workflow, they are partners in a two-stage process.- Stage One: Shaping (Rubber): Start with your rubber tips. Use their strong grinding force and rigid precision for the "heavy lifting"—rapidly removing excess material, trimming metal supports, and defining your initial margins.
- Stage Two: Shining (Silicone): Then, switch to silicone (especially the specialized Diamond Impregnated series). This is your closing tool to achieve that final, mirror-like gloss and to navigate the intricate anatomy of the occlusal surface that rubber would only obliterate.
Leave a Reply
Your email address will not be published.Required fields are marked. *